7 Nightlife Photography Tips: How To Get The Best Shots and How To Survive It
We’re not gonna lie: shooting bars and clubs can be tricky and mentally exhausting. If you’re a real beginner to photography, we’d definitely recommend you get used to camera settings and also get used to adapting quickly to environmental changes, as well as learning a good understanding on lighting. It can get hectic and overwhelming sometimes, especially in clubs! Sadly, more than often, we see photographers uploading poor work and, honestly, it’s probably from the lack of knowledge shooting in such environments.
So how do you make sure you’re not producing poor, sloppy work for a bar or club where people go to enjoy themselves? From lenses to editing, we’d love to share 7 important nightlife photography tips to help you get the best shots to reflect a bar or club’s business, and also how to survive the rush and overwhelming world of late-night partying as a photographer!
Don’t forget to check out our 9 Event Photography Tips blog post if you want to get the best, professional shots!
Some links may give us a commission at no extra cost to you!
1. Rock up early to prepare yourself with a schedule
We’d suggest turning up to the club at least 10 minutes before (i.e. if you haven’t had another job beforehand) to set up your gear and also to check with who’s running the night to see if any confetti, CO2, or pyro etc are going to be used at particular times. You definitely don’t want to be shooting and not knowing confetti is going to go off at 01:15am and you’re not in the right position to capture it! It won’t look good or professional if you fail to capture the big shots!
2. Charge the right amount for the job
This might sound obvious but there are a few factors to take into consideration when it comes to shooting clubs and bars - especially club nights. When Adam first started working for a rock/emo club in Leeds 4 years ago, he was getting paid £30 for 2 hours, and I was getting paid the same to do photography at the same club 2 years after. £30 for 2 hours sounds decent, right? If you’re happy to be paid that, great! And if the venue really can’t afford it, then there’s not much you can do but know your worth and think about the surrounding factors. For instance:
Which city/town is the club or bar located? The bigger and busier the city/town, generally, the more you should be getting paid
If the venue itself is big, you should receive a bigger pay. Think about how many tickets or door entries are sold. For example, if a venue holds 500 people and is £5 on the door. That’s £2,500 on tickets alone. Now add in the number of drinks drunk people buy at the bar!
Charge double for New Year’s Eve and also a time and a half for bank holidays
Take into consideration how you’re actually getting to said venue - especially if it’s by taxi (higher rates late at night/early hours of the morning and also during holiday periods). And if you turn up to a job and they decide to turn you away because the night is dead, ask for them to pay some of what you were going to be paid as your time has been wasted.
3. Choose the right gear
LENSES
When it comes to lenses, we are favourable of the Sigma 35mm 1.4 art lens (we’ve used this a lot for events too), the Sigma 15mm fisheye lens, and also the Tamron 24-70mm lens. All three of these lenses get the job done beautifully.
Taken with the Sigma 35mm
The Sigma 35mm is perfect for when you’re on club floors and also in bars as there’s less space for you to move around, so you can be closer to your subject(s) with such a lens. A fisheye lens is brilliant for crowd and/or confetti shots - just don’t be that person who overuses it. Additionally, the Tamron 24-70 is a fantastic all-rounder lens if you can’t be bothered switching lenses throughout your shift, or it’s simply the only one you have your hands on!
SPEEDLIGHT FLASH AND ROUNDFLASH DIFFUSER
Get creative with lighting using a speedlight flash. Take more than one trigger with you so you can place the speedlight where ever you like. For DJ shots, placing the speedlight on either the right or left facing the DJ creates a nice lighting effect.
In our opinion, from experience, the best diffuser to use when shooting off-camera is a roundflash.
OPTIONAL HOOP LIGHT
Using a hoop light can give you amazing lighting for your photos - however, it’s only best used for big clubs or bars where there’s less partying going on. Carrying a hoop around can also be annoying and people (and by people, we mean drunk people mainly!) may try and hula hoop with it and also sometimes grab it for no reason. You know how grabby grabby drunk people can be (eurgh). As well as this, candid shots can be hard with a hoop light because your shutter can’t be too high and the hoop itself doesn’t have a flash so it doesn’t capture movement very well.
Hoop light in frame on the left
This is the effect a hoop light can give
4. Be confident with camera settings
If you’re a beginner using a camera, we’d highly recommend learning and getting familiar with the most important settings on any camera - the aperture, shutter speed, and ISO. Shooting for clubs and bars at night is a whole other challenge, especially clubs. There are so many lights going off and doing their rounds as well as confetti and pyro in major clubs, you have to be quick and confident changing your settings.
ISO
One thing for sure, don’t be afraid to use a high ISO - most likely, you can remove noise in post. Furthermore, the photo(s) will most likely only be used to promote the next event on Facebook, so the quality will be low for web naturally. Push your ISO to 3200 or above if you can.
SHUTTER SPEED
Just remember to try and let as much light in as possible to capture the atmosphere, so you want to aim for a low shutter speed. We usually had the shutter speed at 1/30 - even as low as 1/15.
When using an off-camera flash, don’t use a high shutter speed because the flash captures the movement still when it fires.
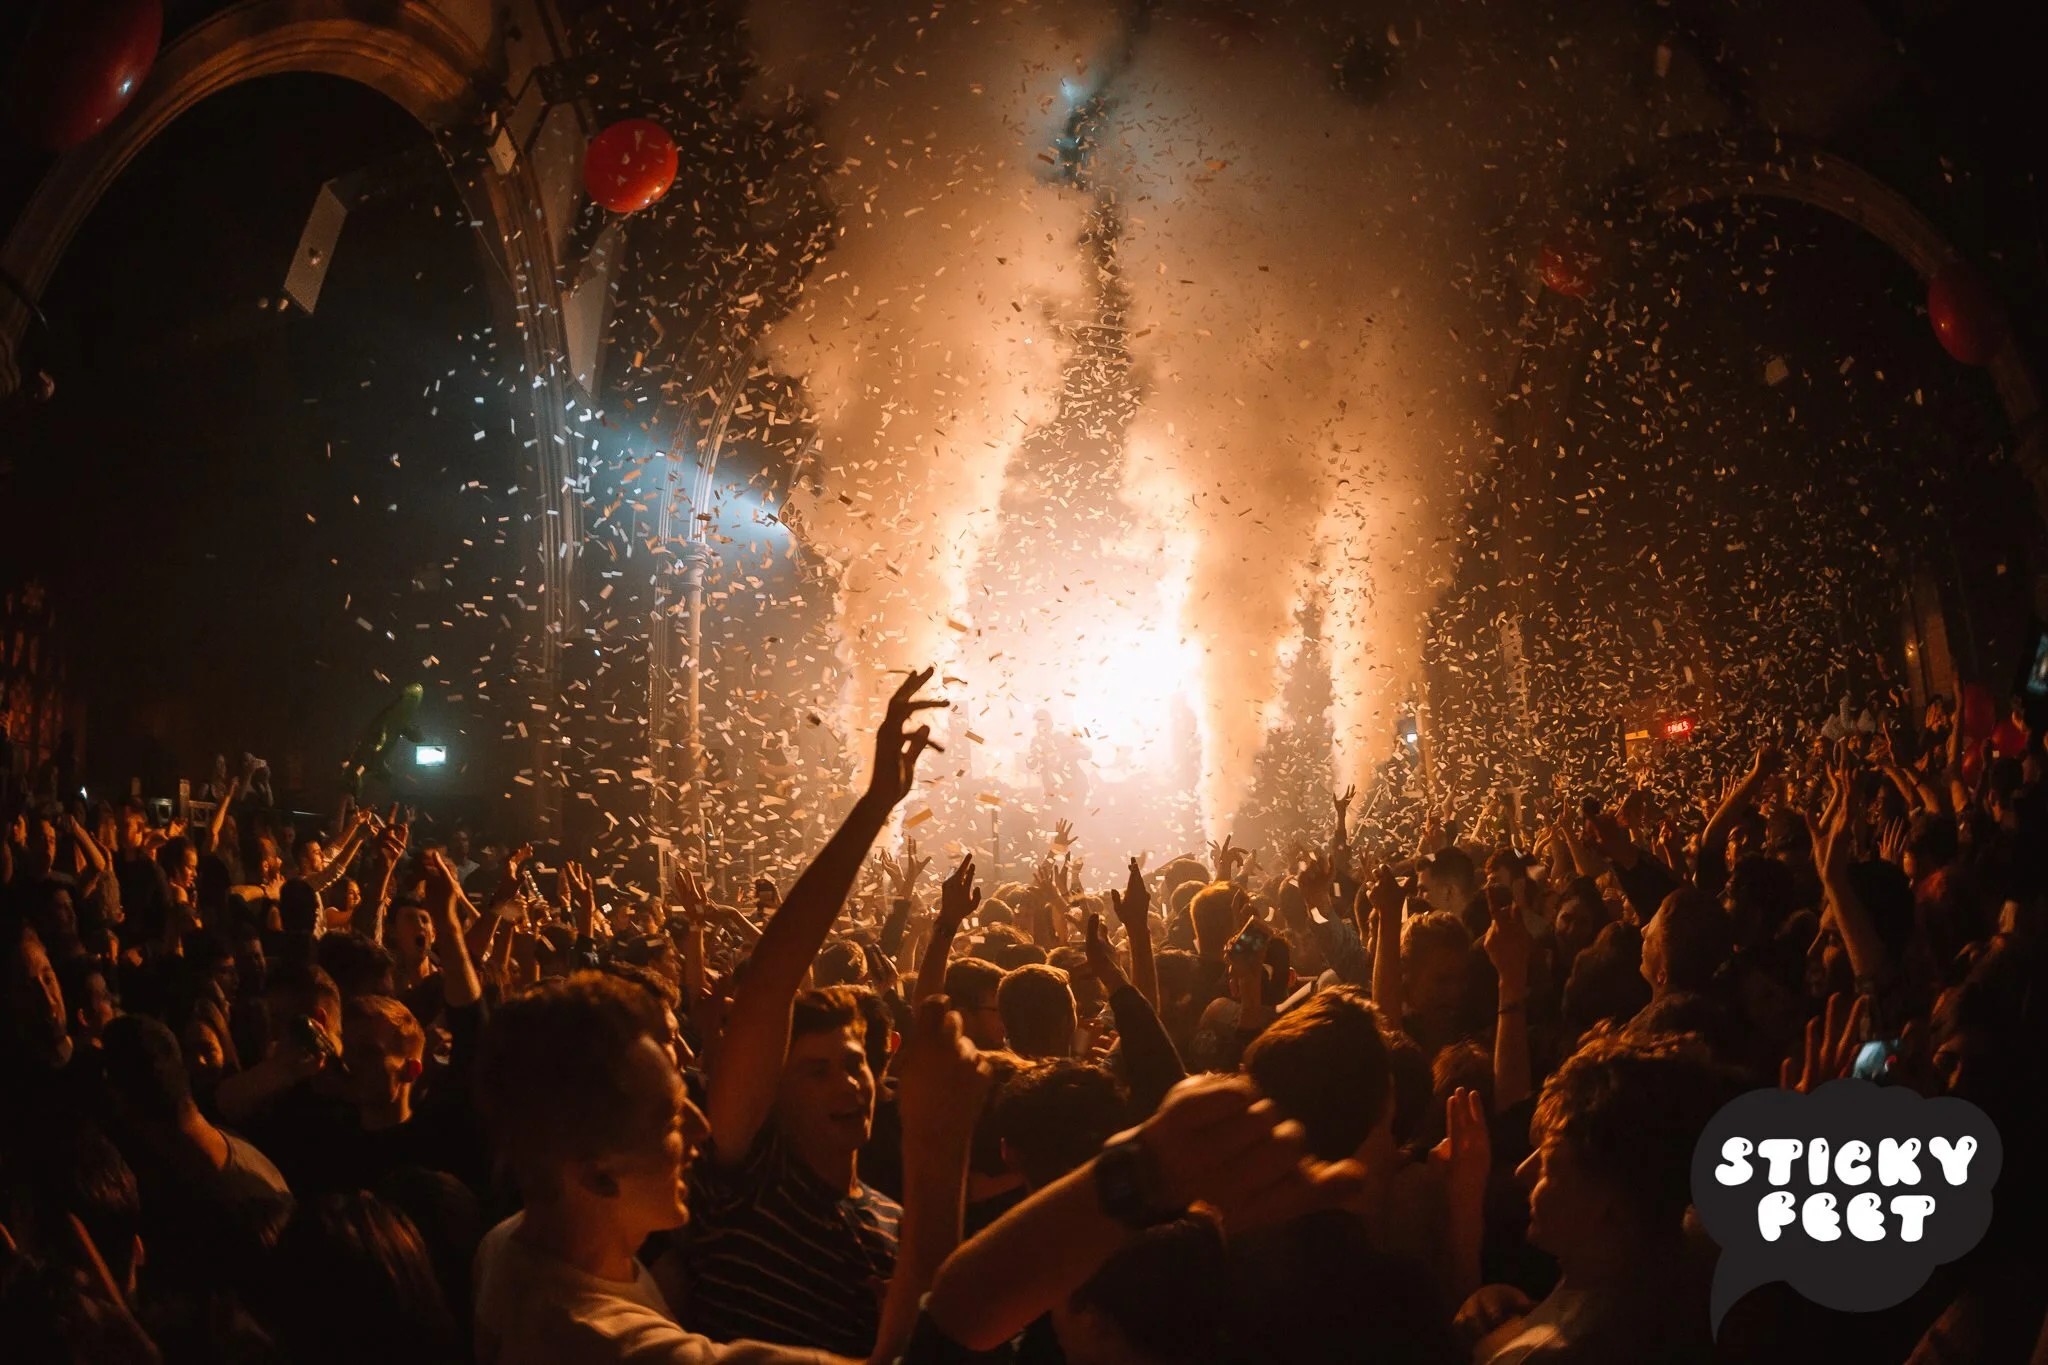
5. Working with CO2, pyro, and smoke machines
All four are extras you must feel ready and comfortable adjusting with. These are things completely out of your control and are adding more of a challenge to your work. None of it will wait for you but you should definitely know when certain ones are timed to go off (as already previously mentioned) so you can prepare yourself more.
CO2
We always used a high ISO with a semi-high shutter speed with the Sigma 15mm fish eye lens. Generally, our settings were: ISO 3200, shutter speed 1/250, and f/stop 2.8.
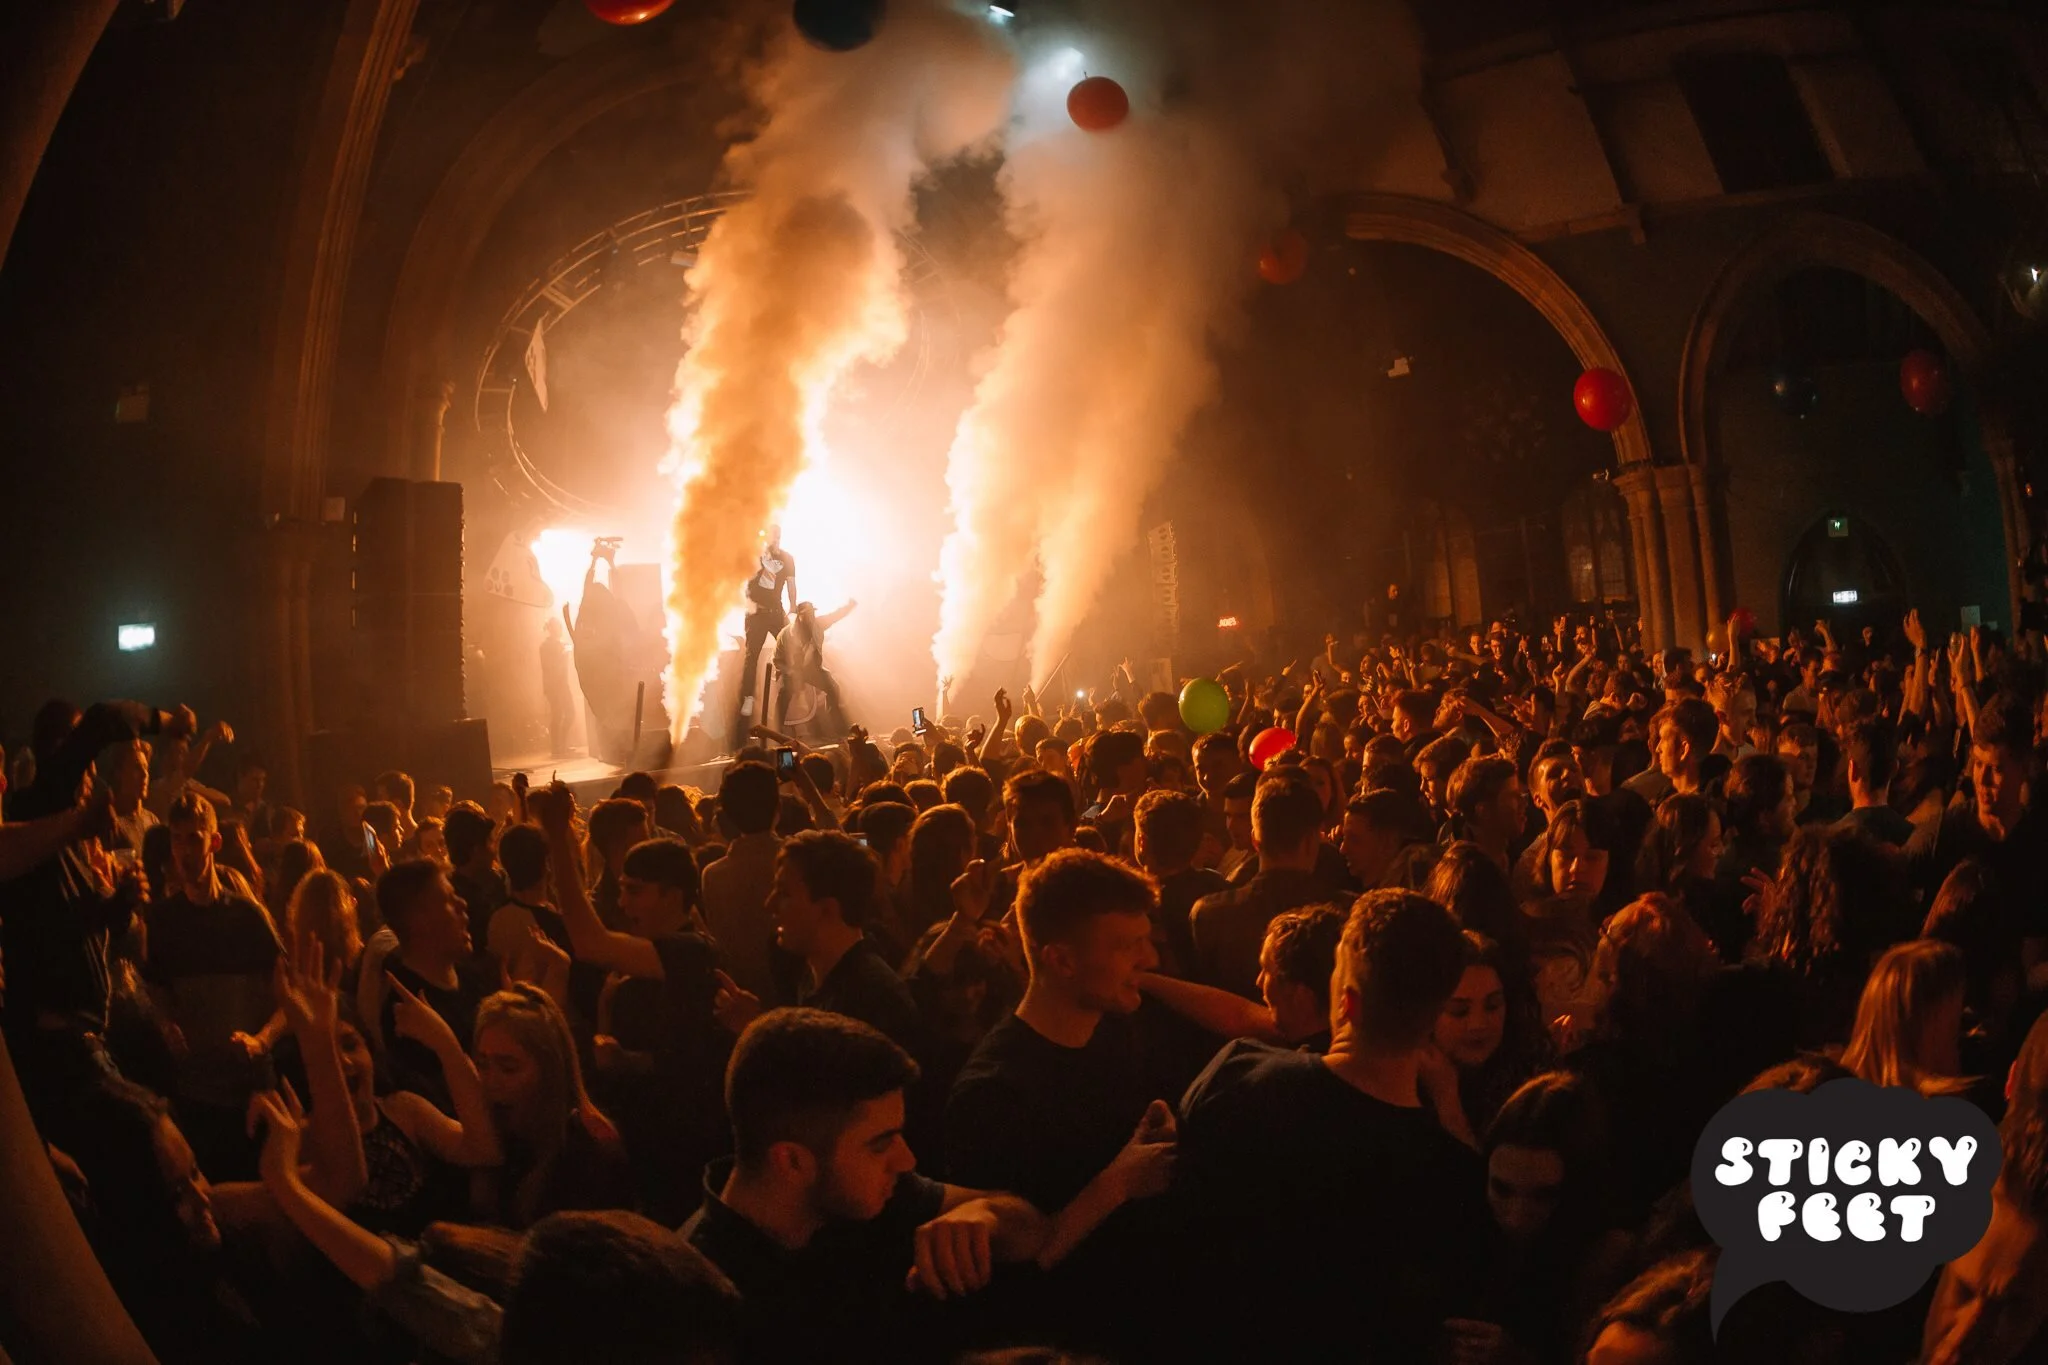
PYRO
Watch your ISO if pyro suddenly goes off. You don’t want a high ISO because you will end up with an overexposed photo. If you don’t know which settings to use, the best thing you can do is when the pyro goes off, be quick on your camera buttons to shoot up your shutter speed to around 1/400 and do a test shot. Then adjust the shutter speed if the test shot is overexposed or not.
SMOKE
Smoke can be a REAL photo killer. There’s not much you can do during post with it either. Definitely try and wait until any smoke has died down before hitting that camera trigger. However, if the smoke is too much (seriously, some DJs and/or light techs can be way too smoke trigger friendly), ask the DJ or light tech if they can turn it down. You can’t work in smokey conditions. Usually, DJs listen but if a light tech doesn’t, don’t feel weird reporting their unfairness to the promoter in charge.
6. Getting the right shots
We’d say there are 4 main shots you really want to aim for to pull off a sick - yet professional - album. The 4 main shots are DJ, crowd, people, and queue shots. Let’s discuss!
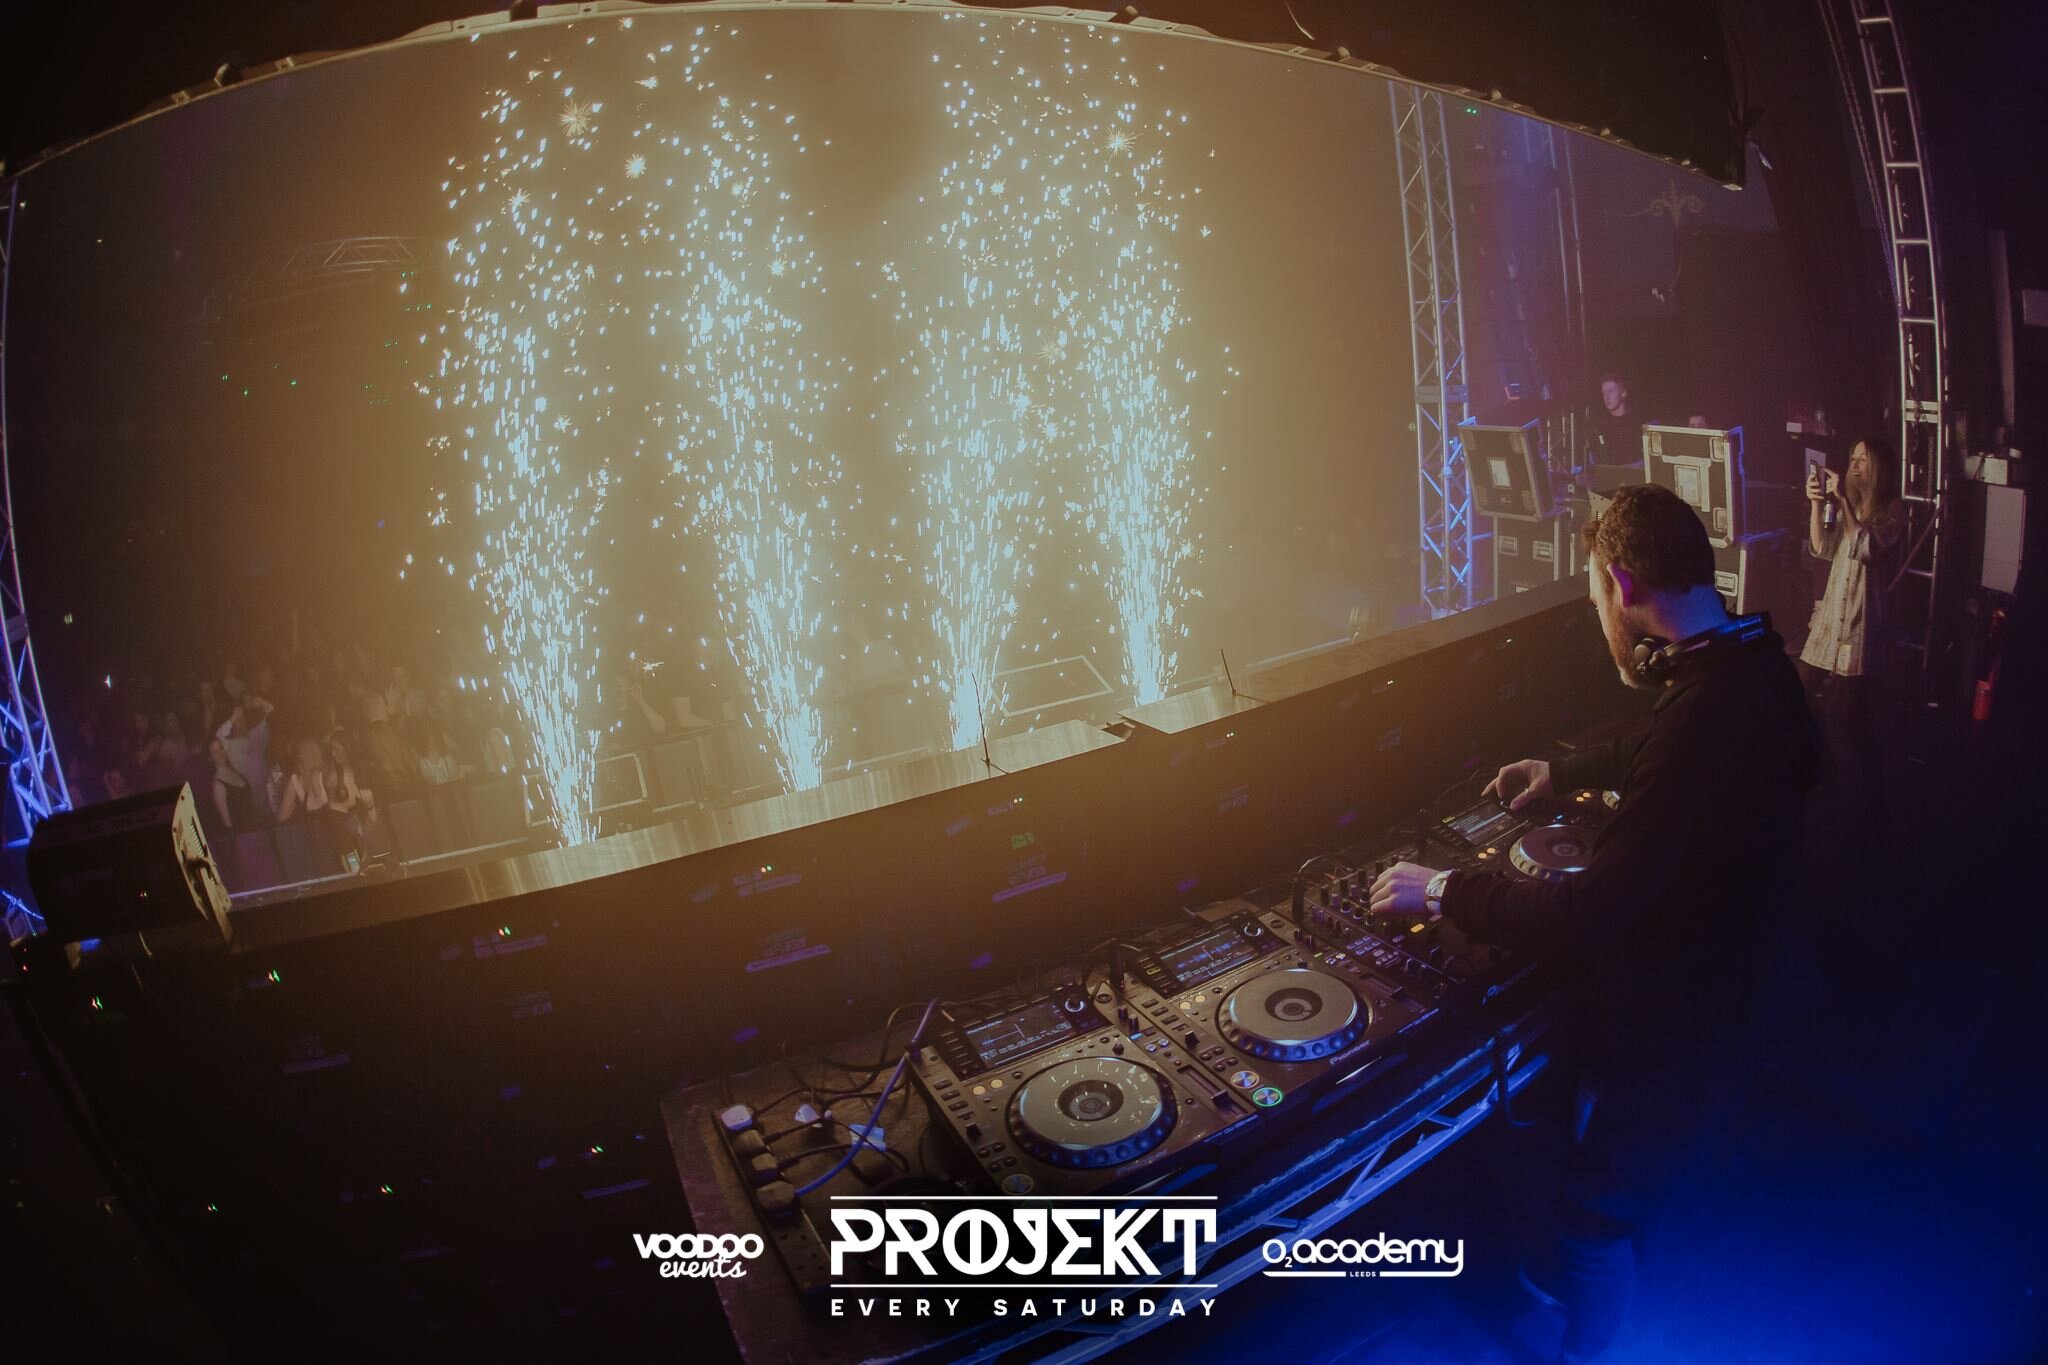
DJ SHOTS
DJs really appreciate shots of themselves, so don’t forget to take some! Even more so, if the DJ is a special guest, you definitely should take a number of DJ shots - mainly so the club or bar can use the images for promotion.
If the DJ looks a little bit too stiff or boring in the shots, don’t be afraid to ask them to be more animated! As well as this, if there are too many people behind the DJ booth, don’t feel rude killing the vibe to get the shots you want - just ask the DJ or (if there is one) the light tech to remove the group of people for a few minutes while you get your work done.
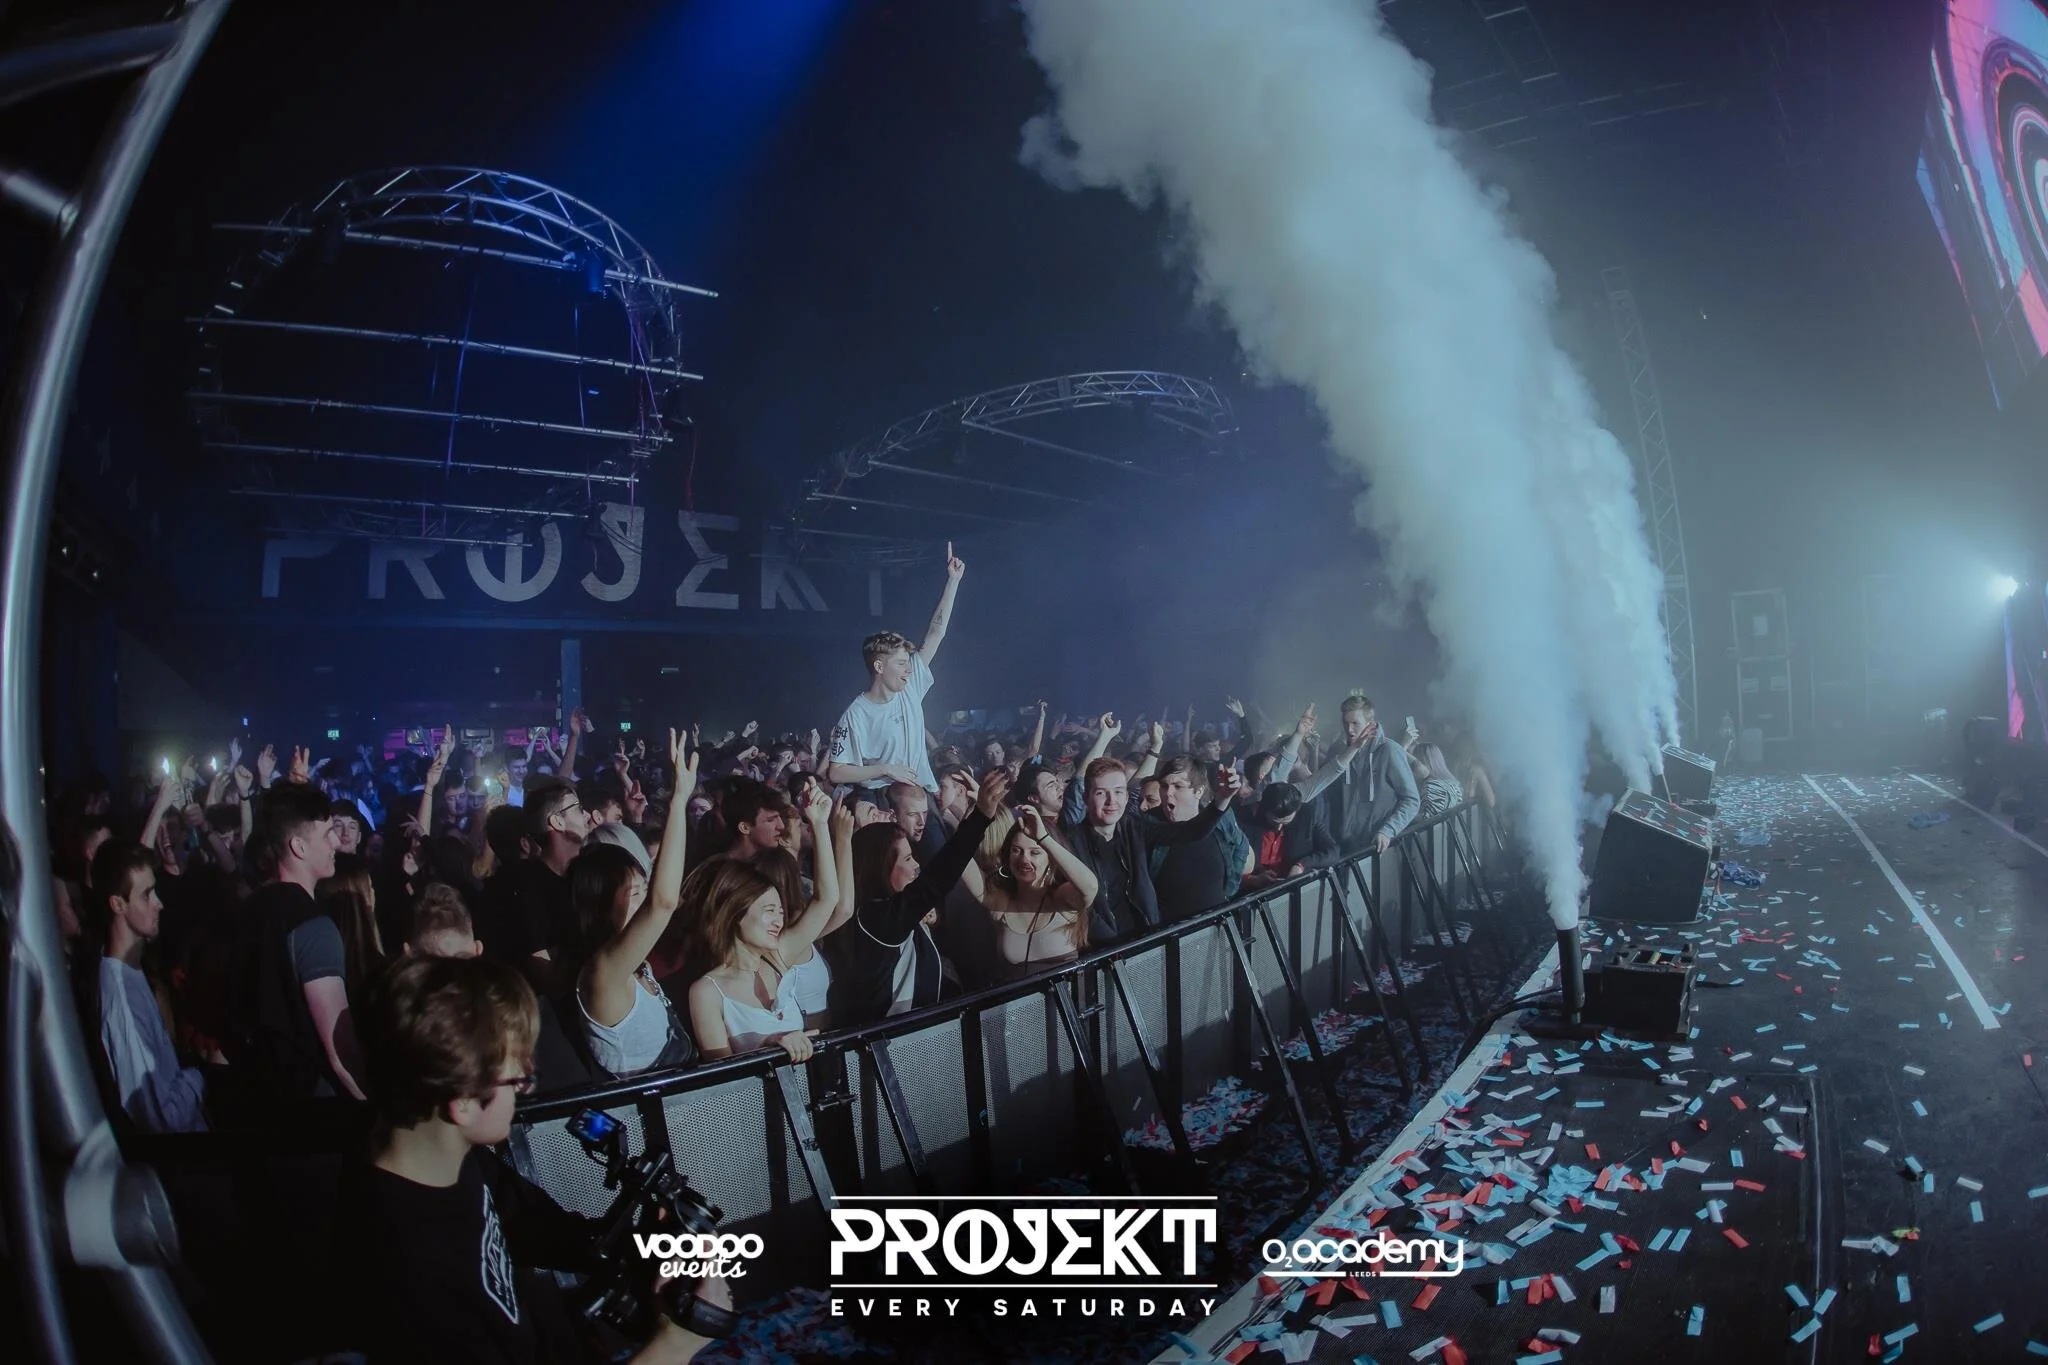
CROWD SHOTS
Crowd shots are always a good one to have. They can really show off the atmosphere in a club and also how popular the night is. If you want to get the crowd to look a bit more lively, ask the DJ to say “hands up” to the crowd!
Don’t forget to capture confetti going off too (so that means knowing a schedule for times before you start!). We’d recommend the best confetti shots are from the centre of the room and one from behind the DJ. Try and use a fisheye lens if you have one to give more life to the atmosphere.

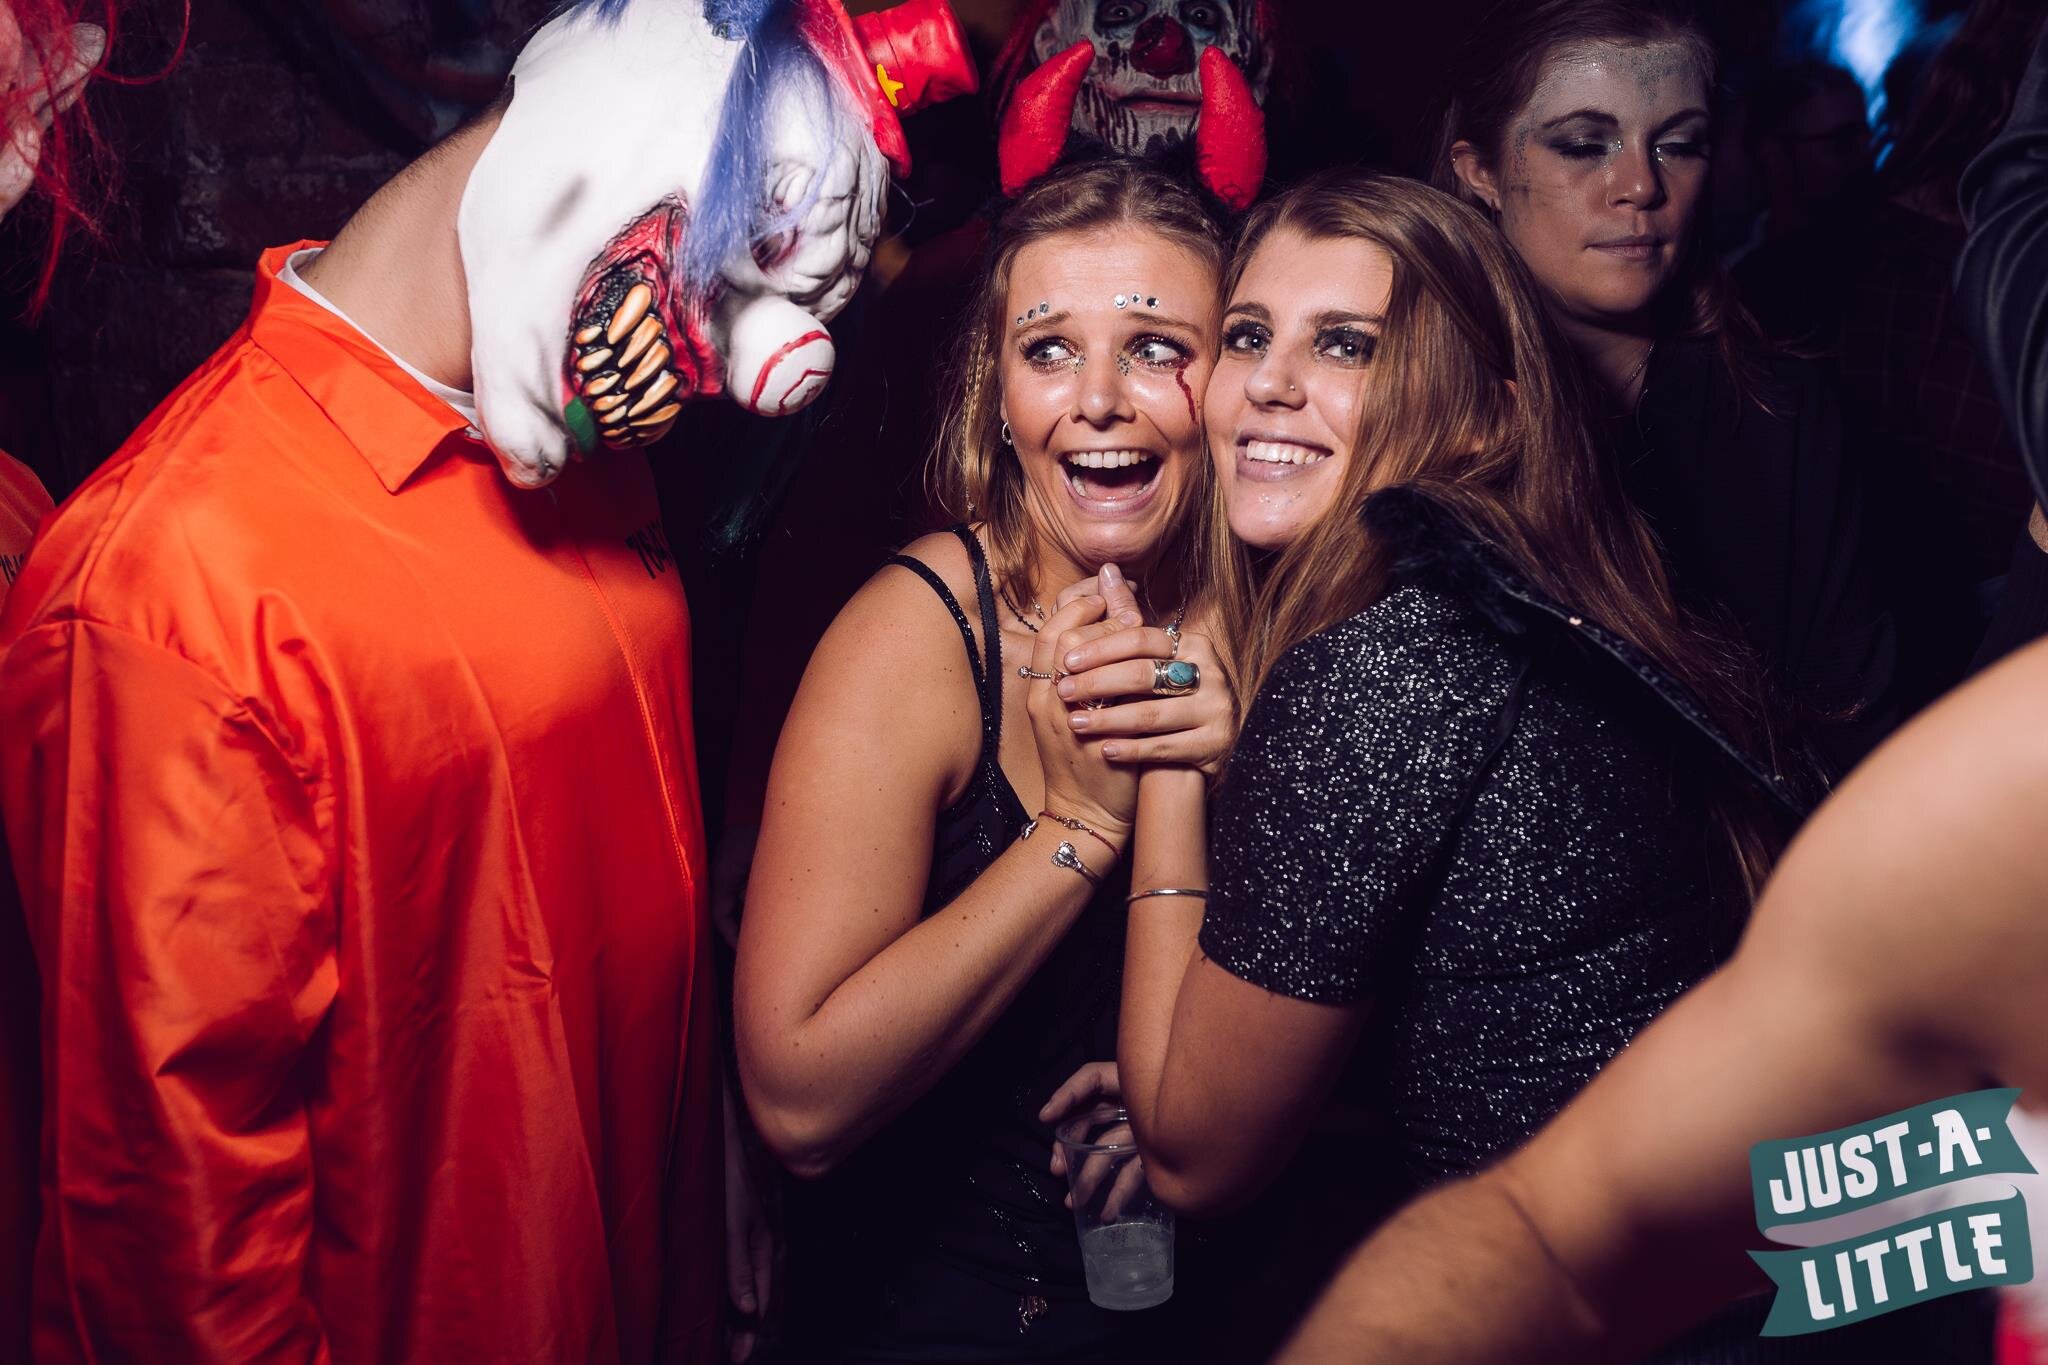
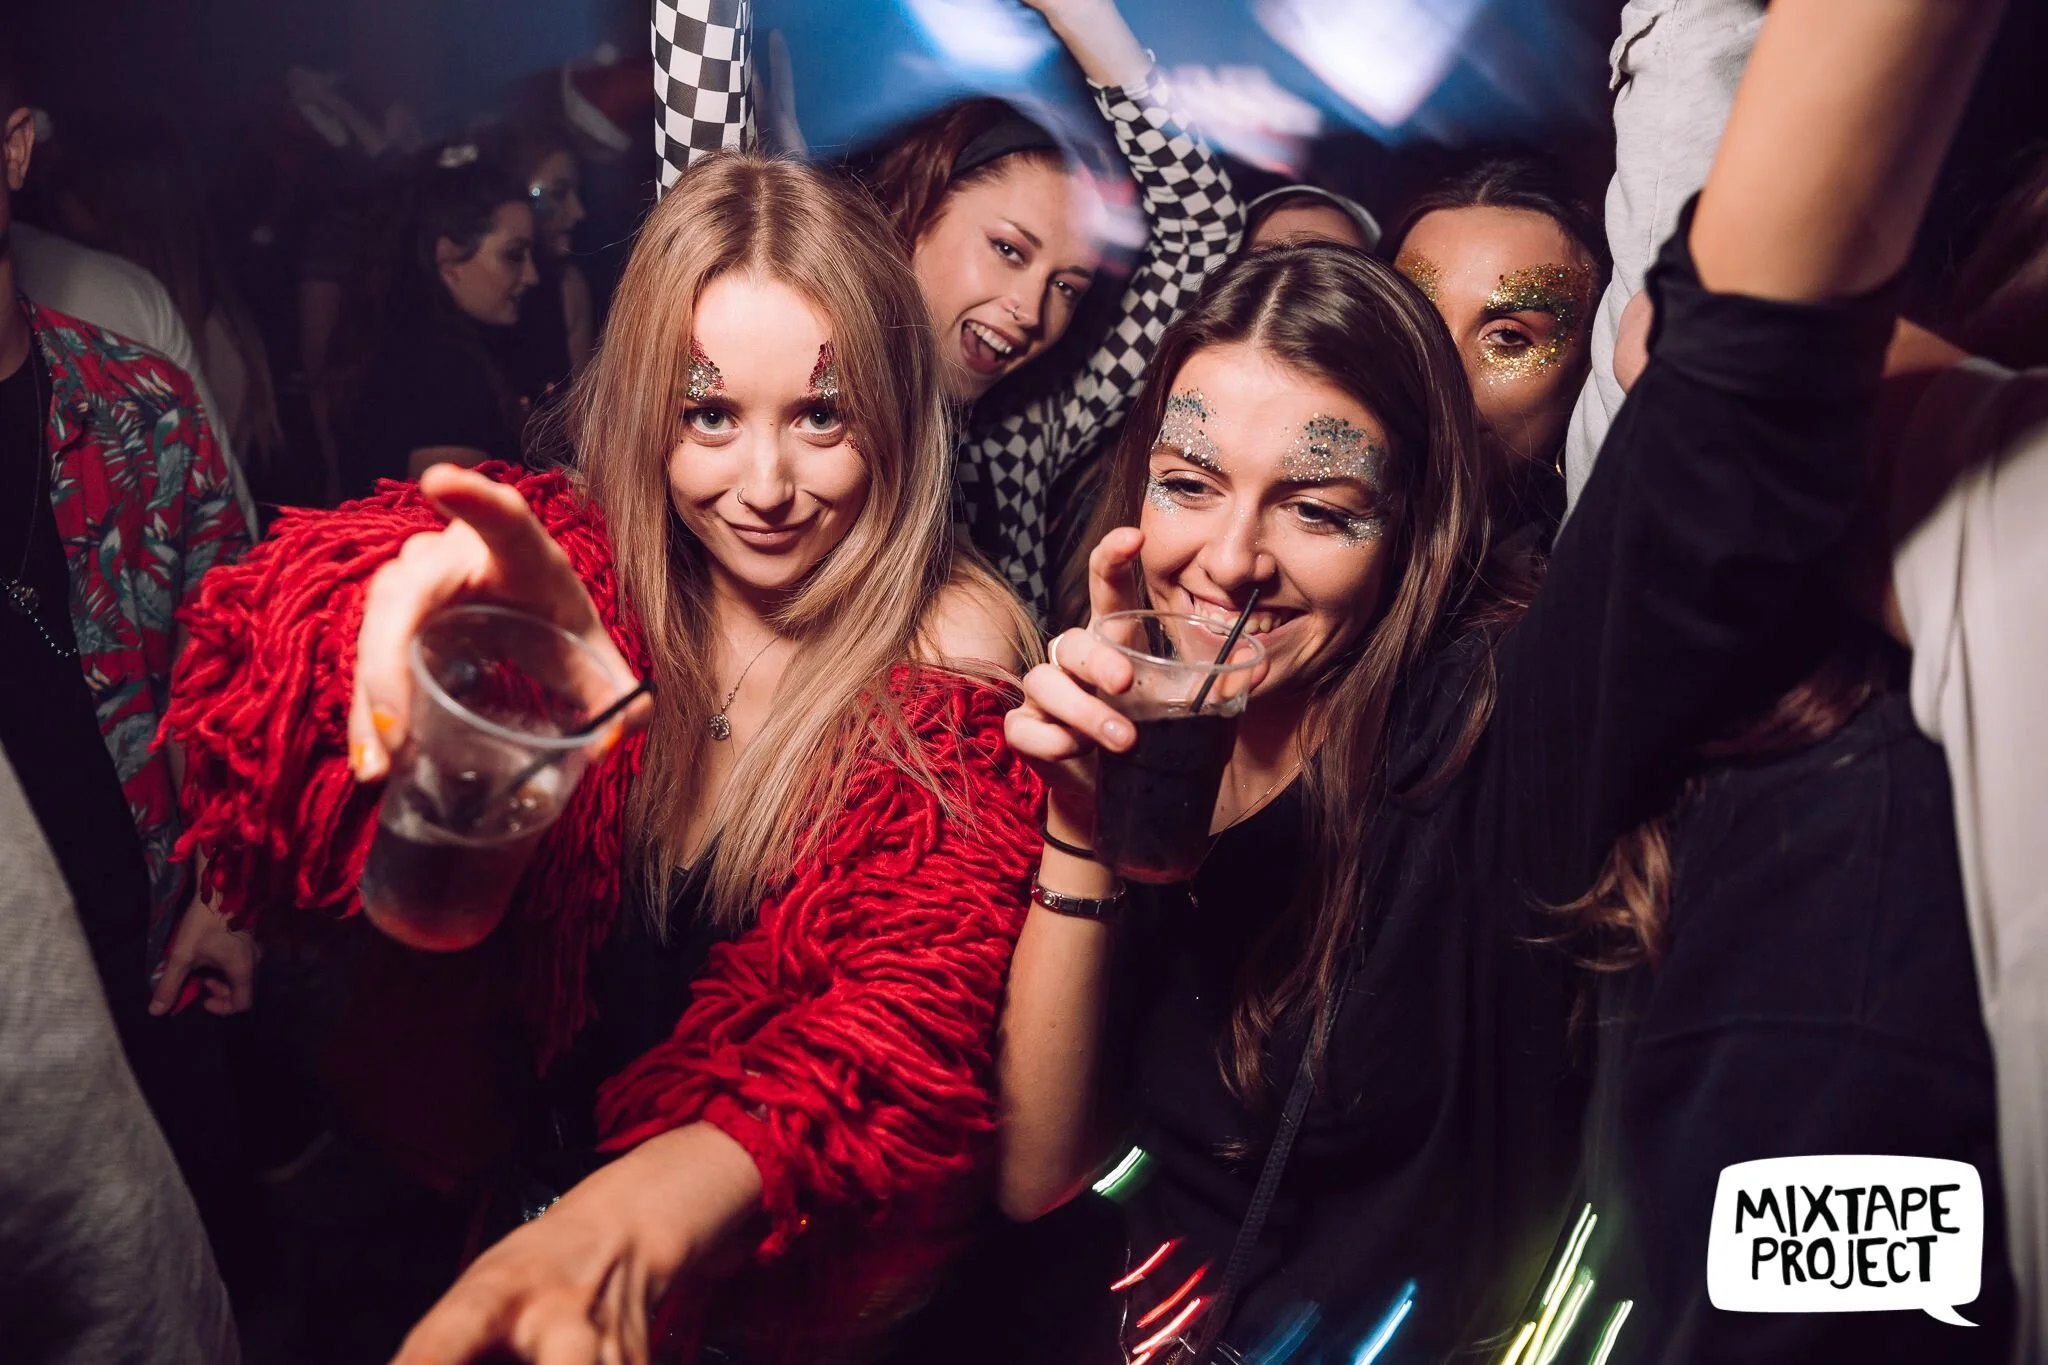
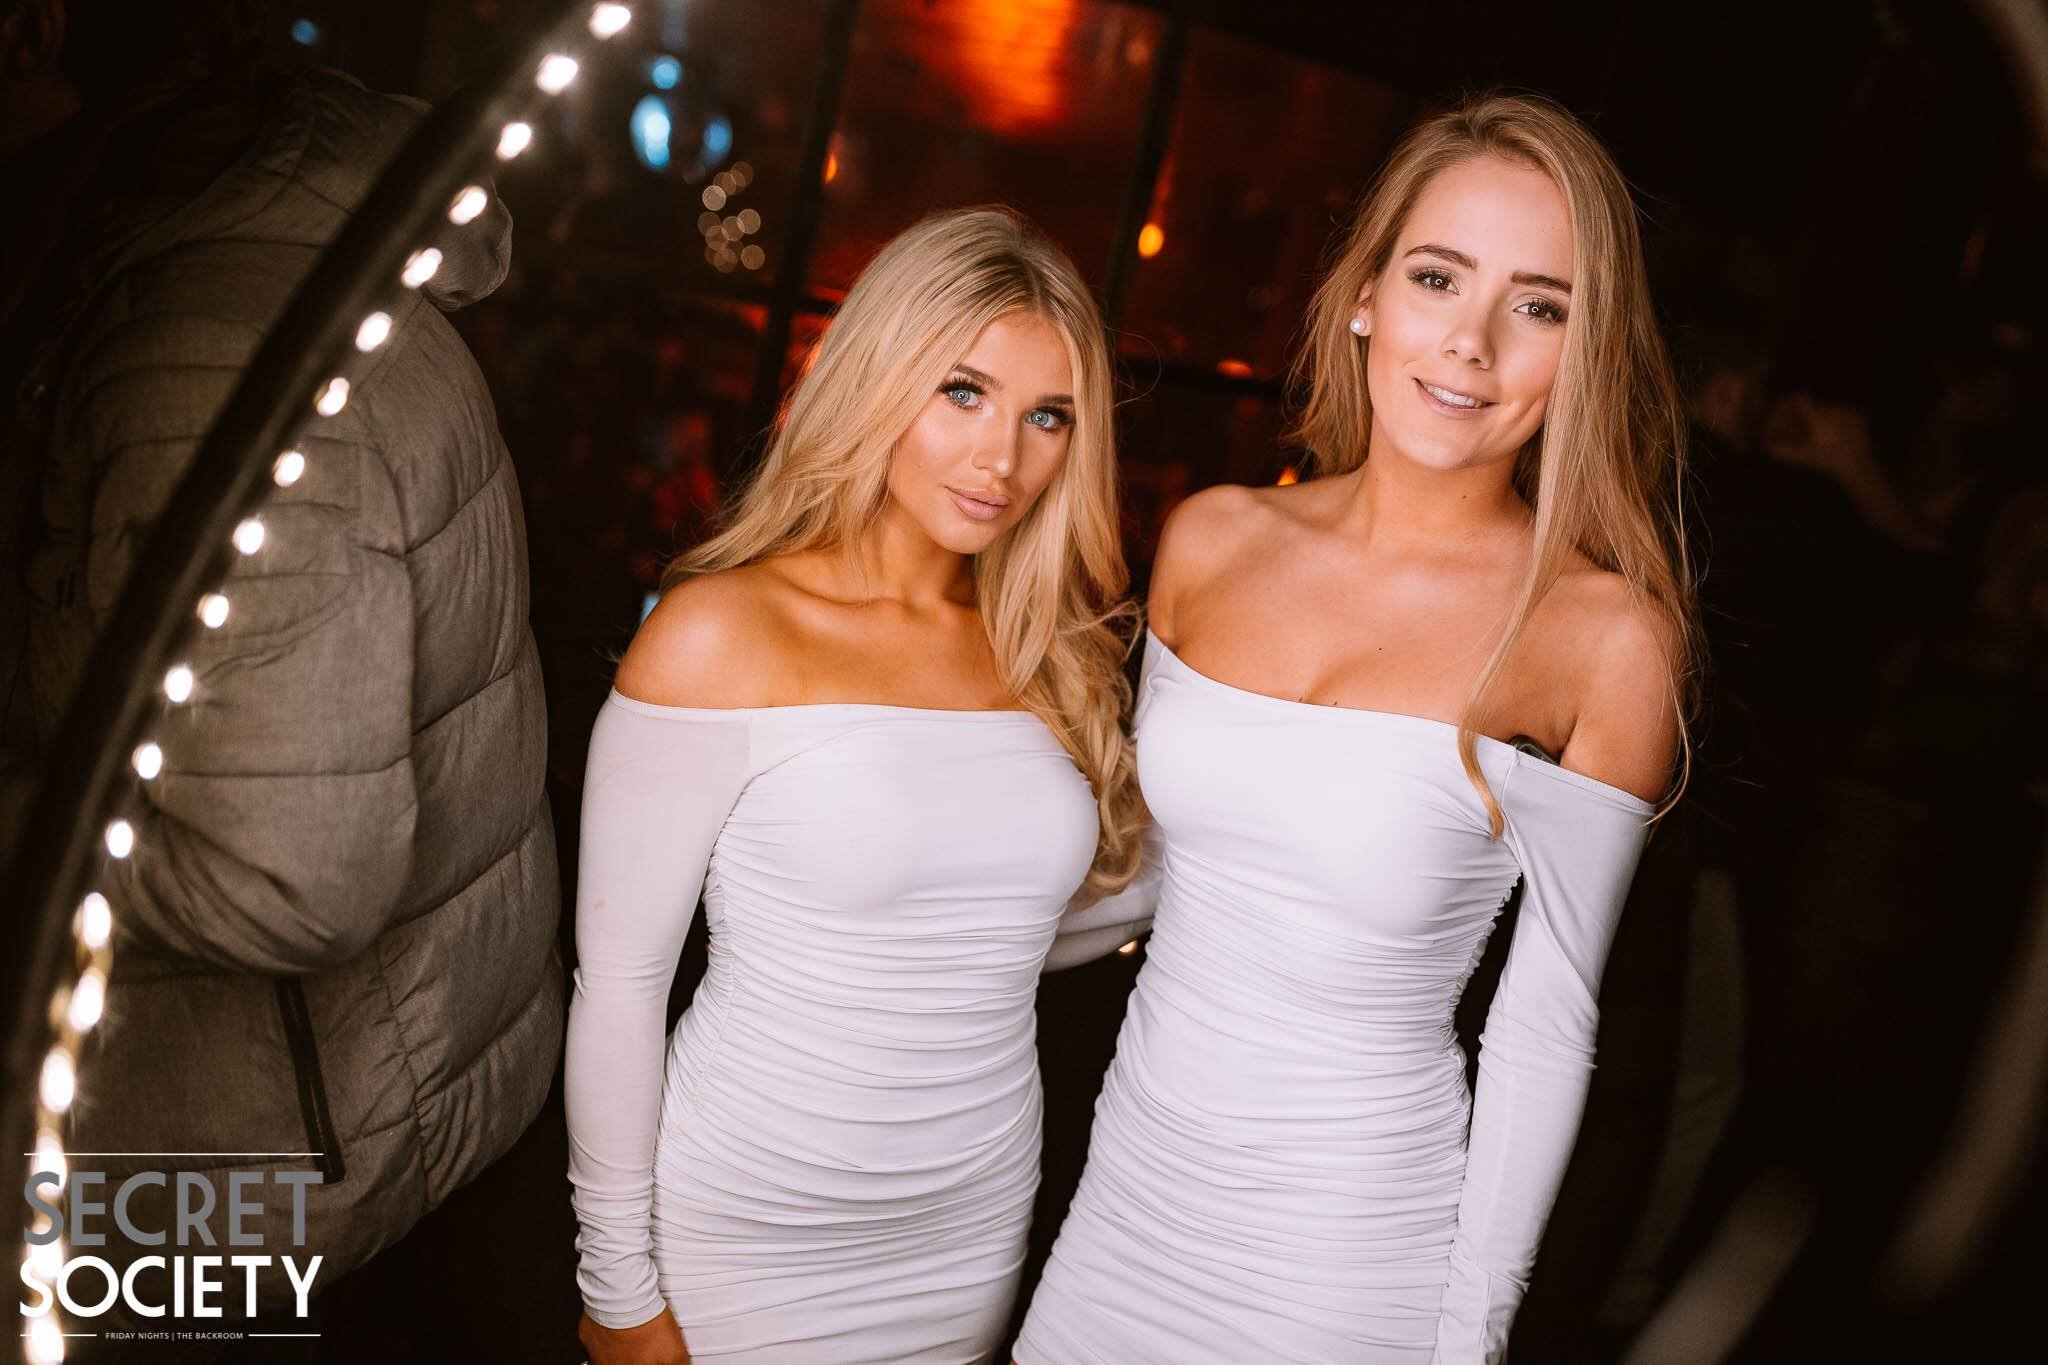
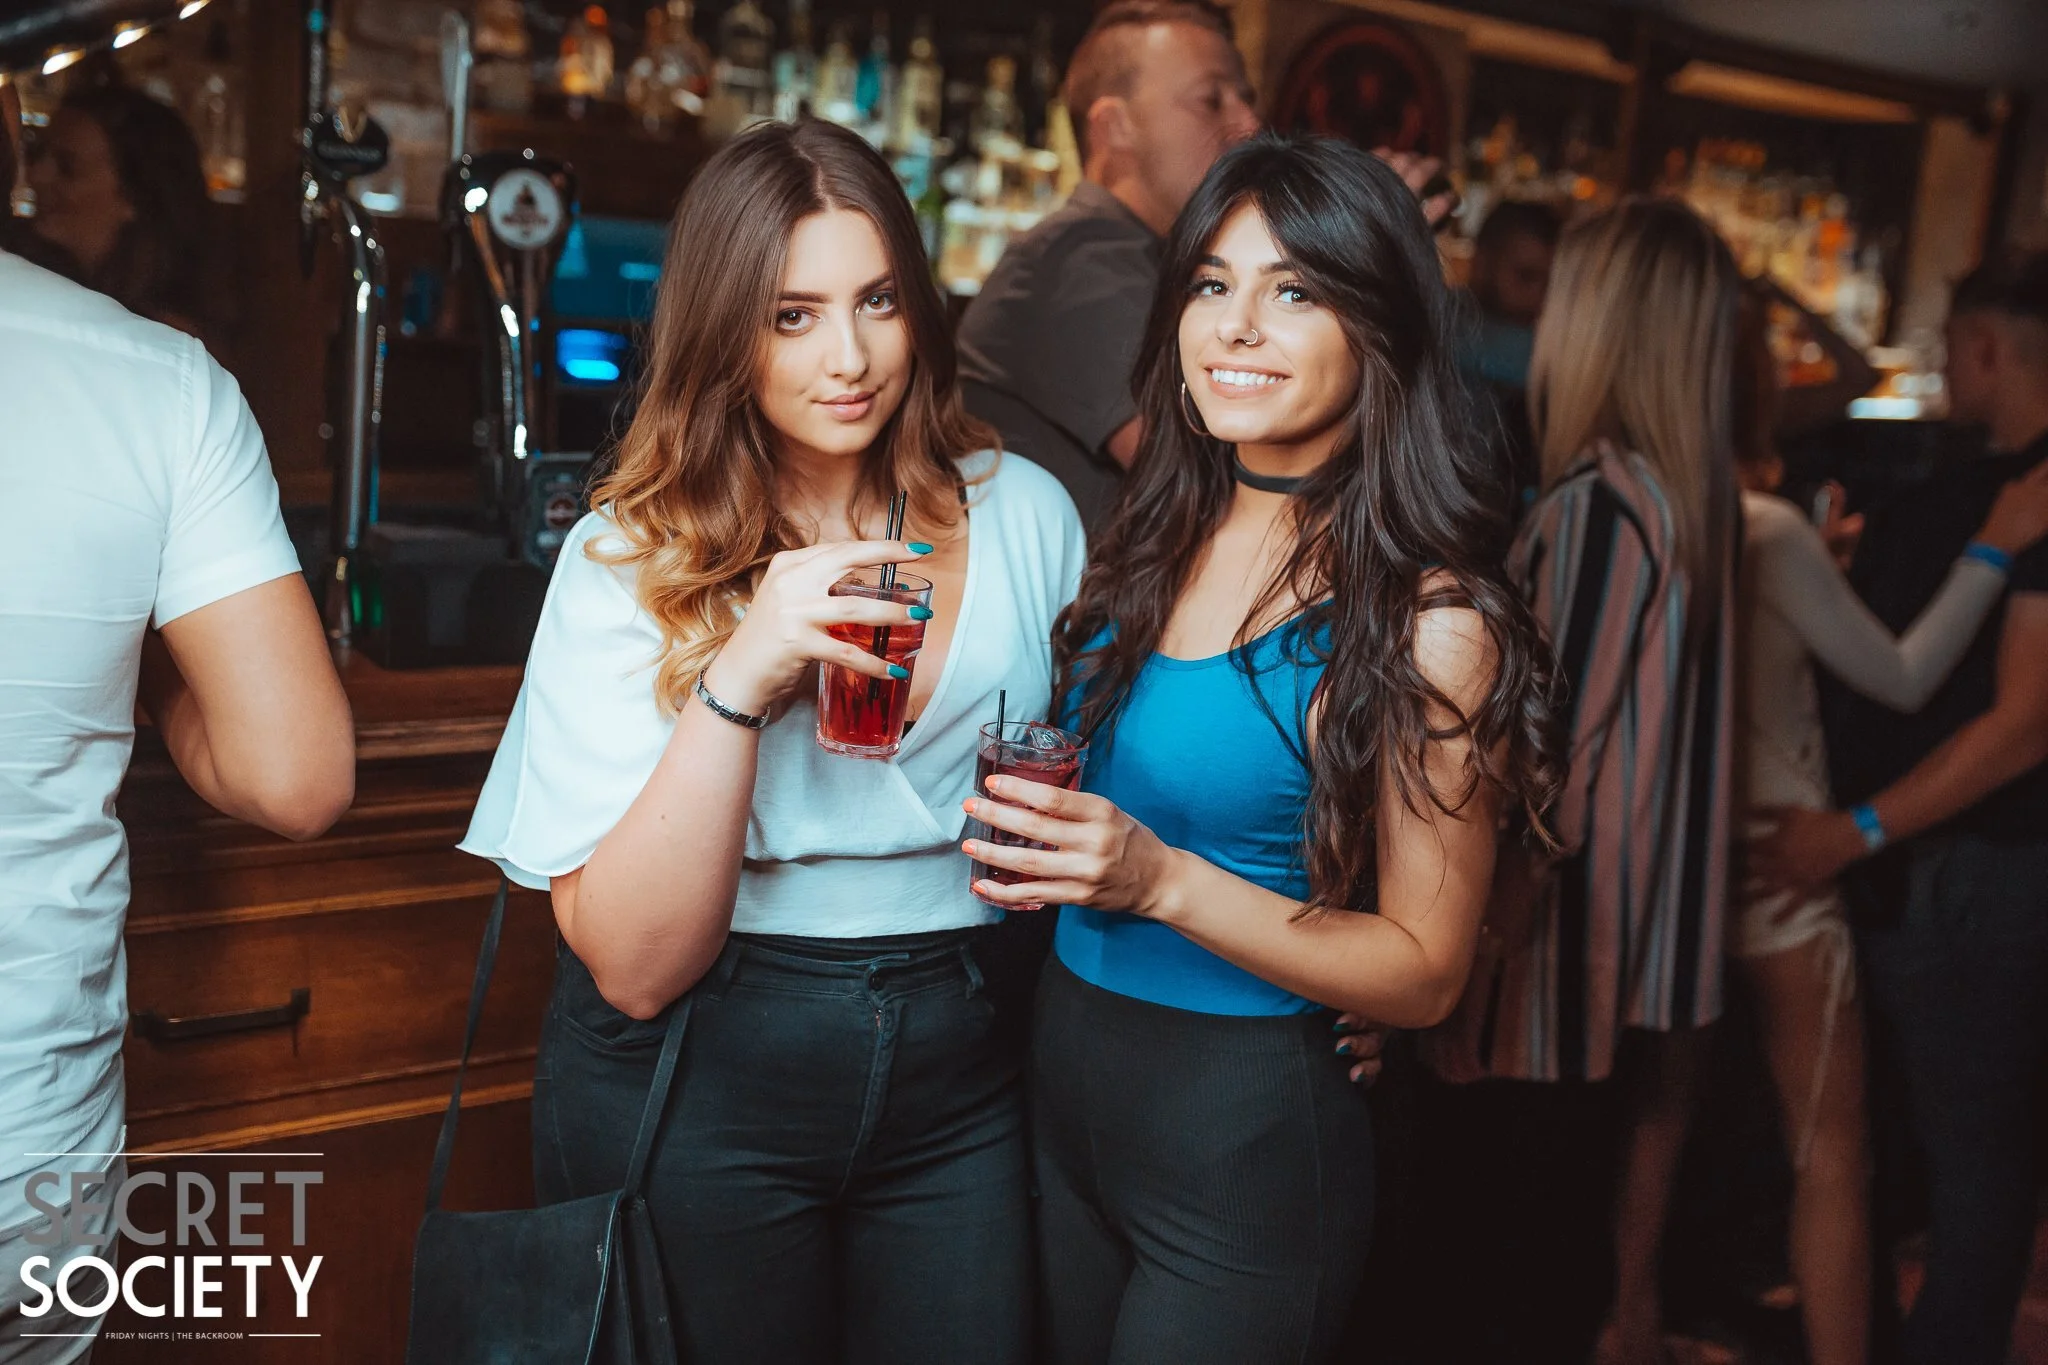
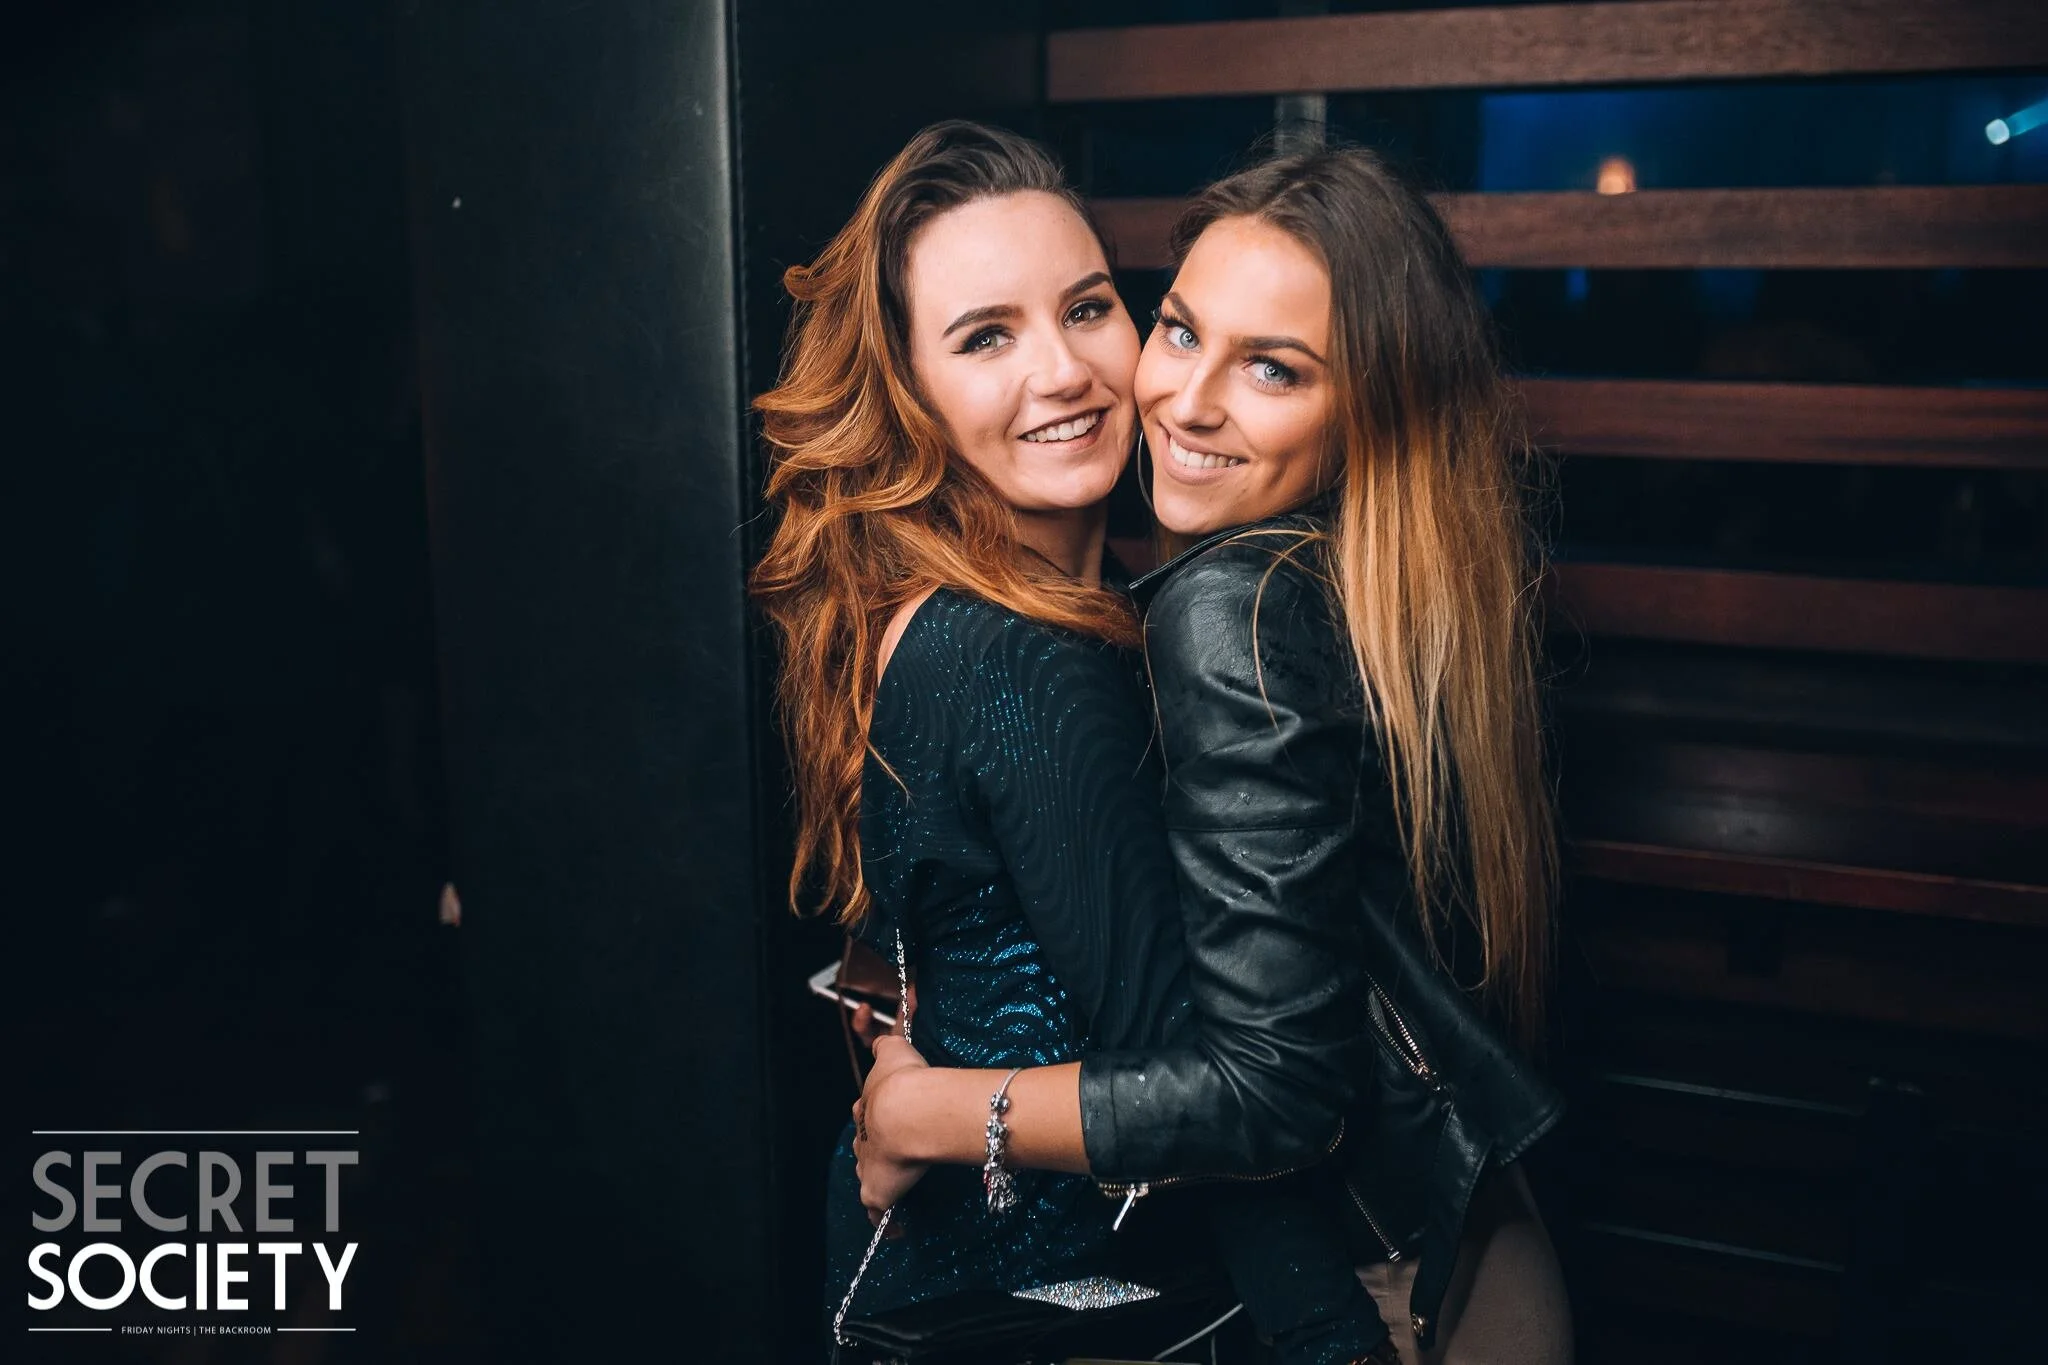
PEOPLE SHOTS
Struggling to get candids? Get into the crowd and become part of the party! Ask people to dance or wave their hands up in the air. If the club or bar isn’t too busy, try and be creative and make the place look like it is. It can be a real pain when it’s a dead night but you just have to work with it.
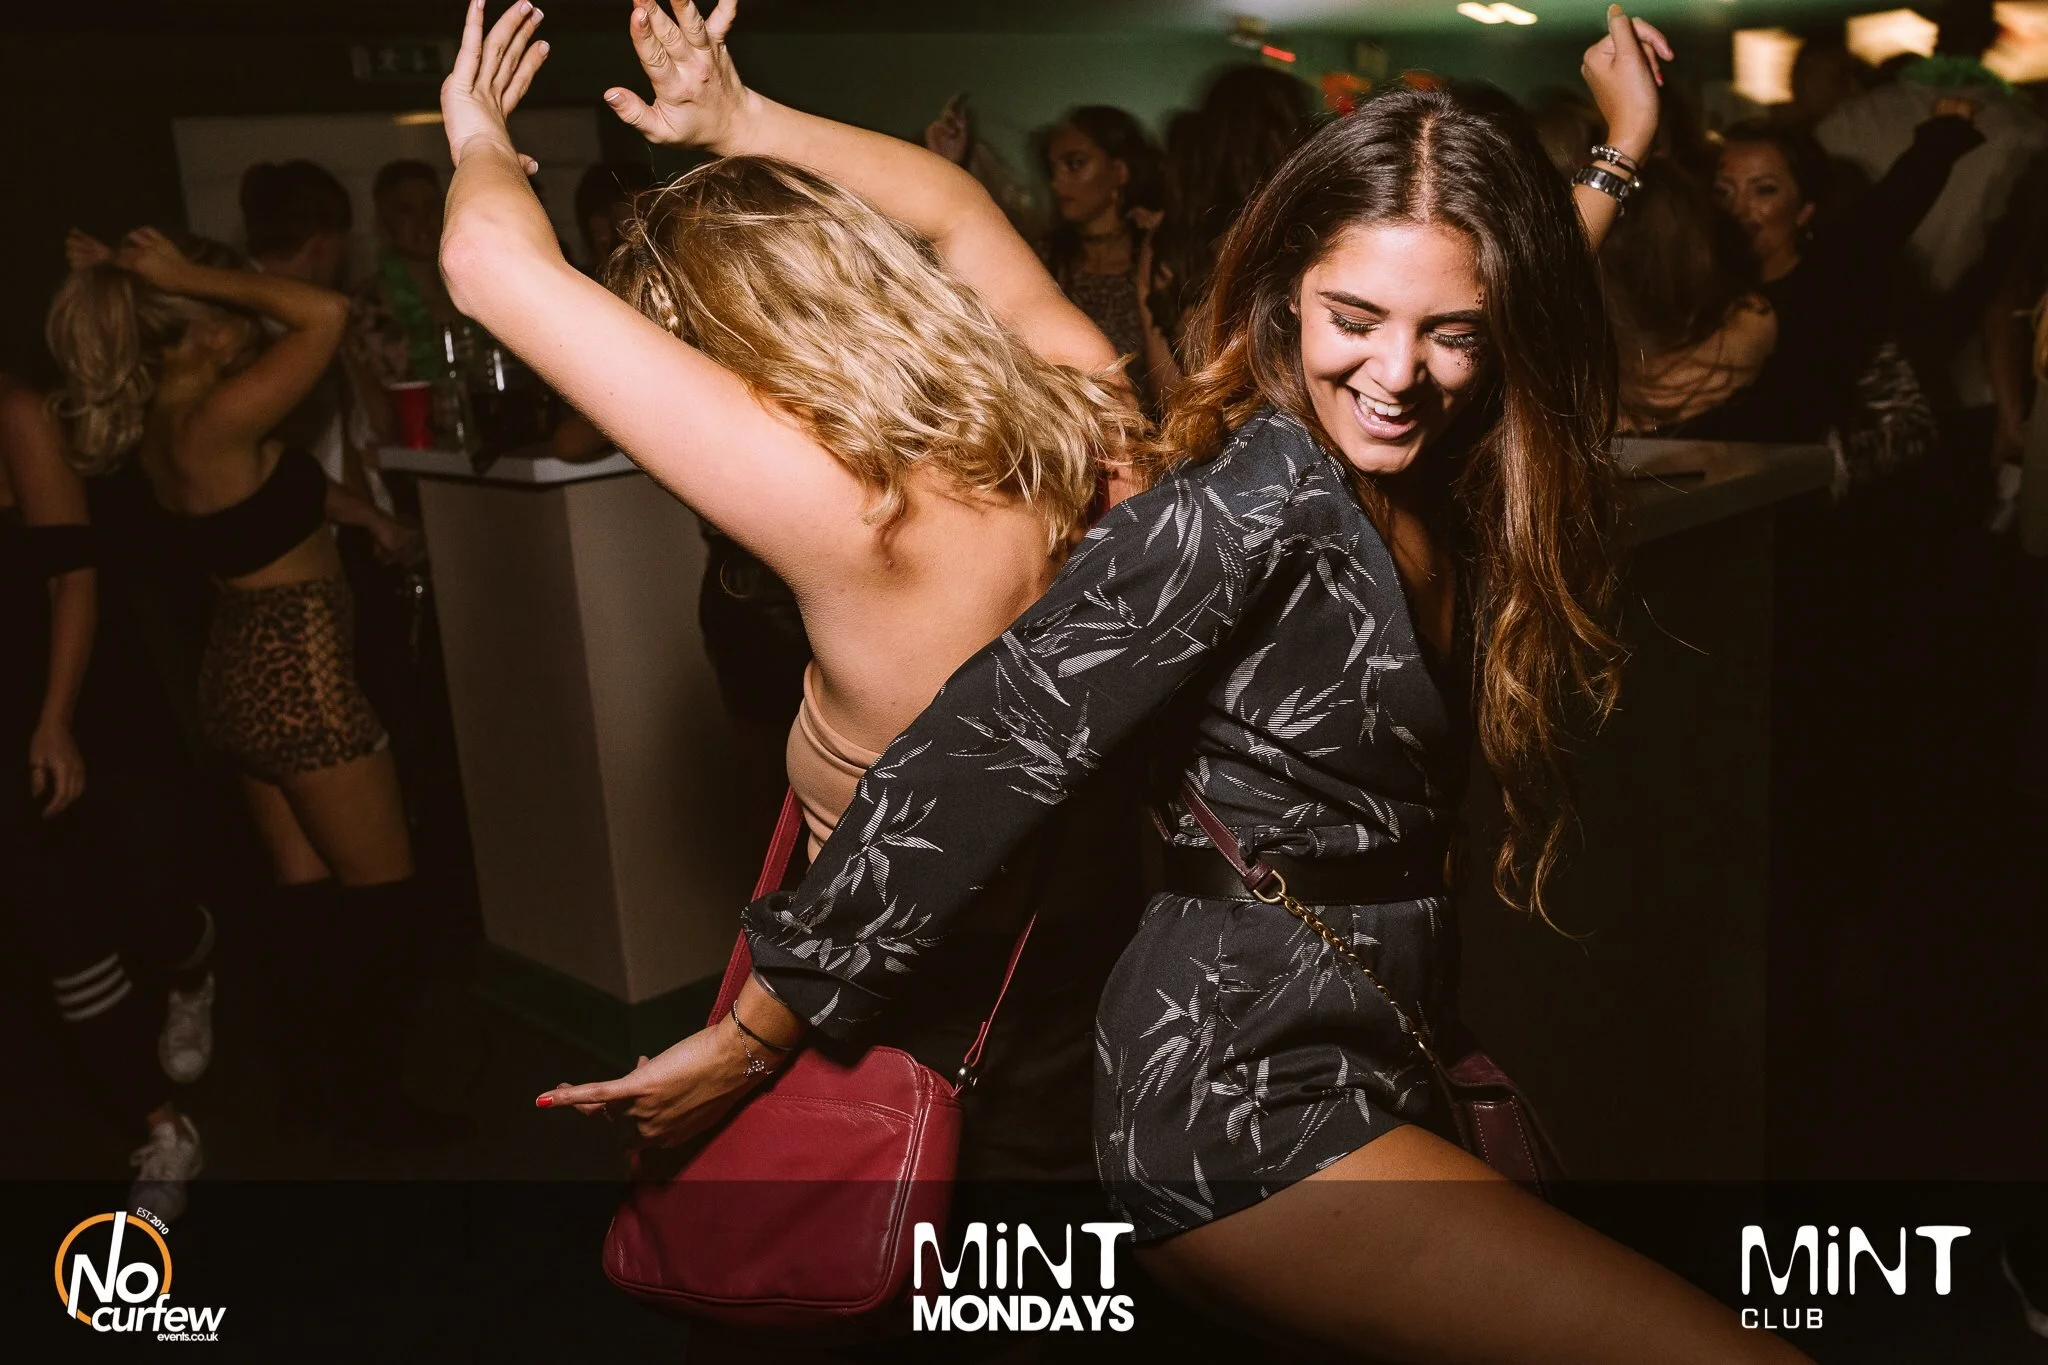
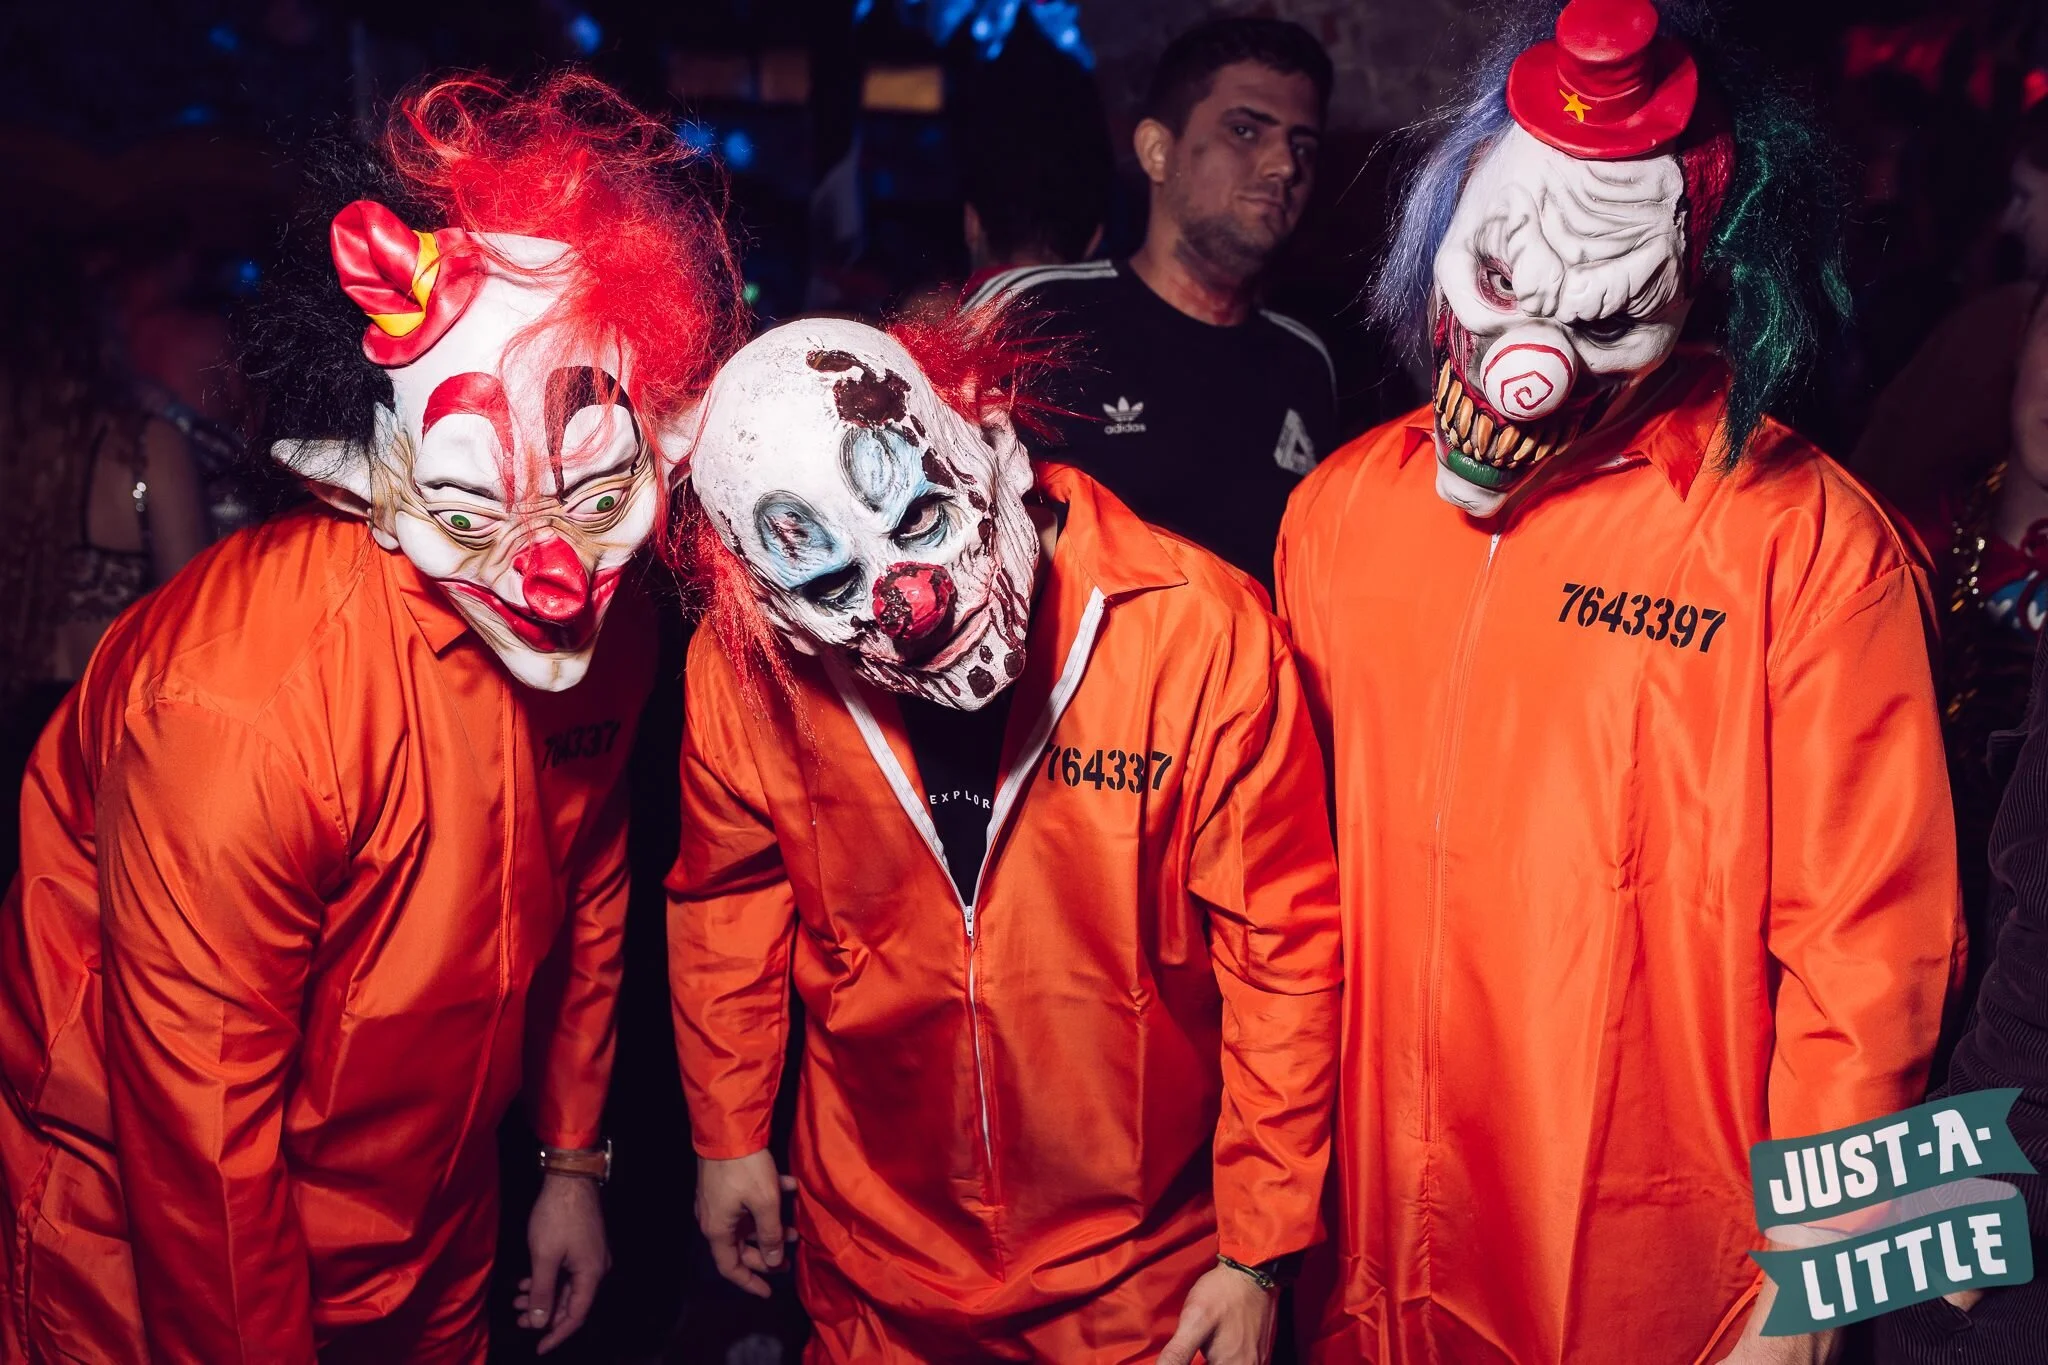
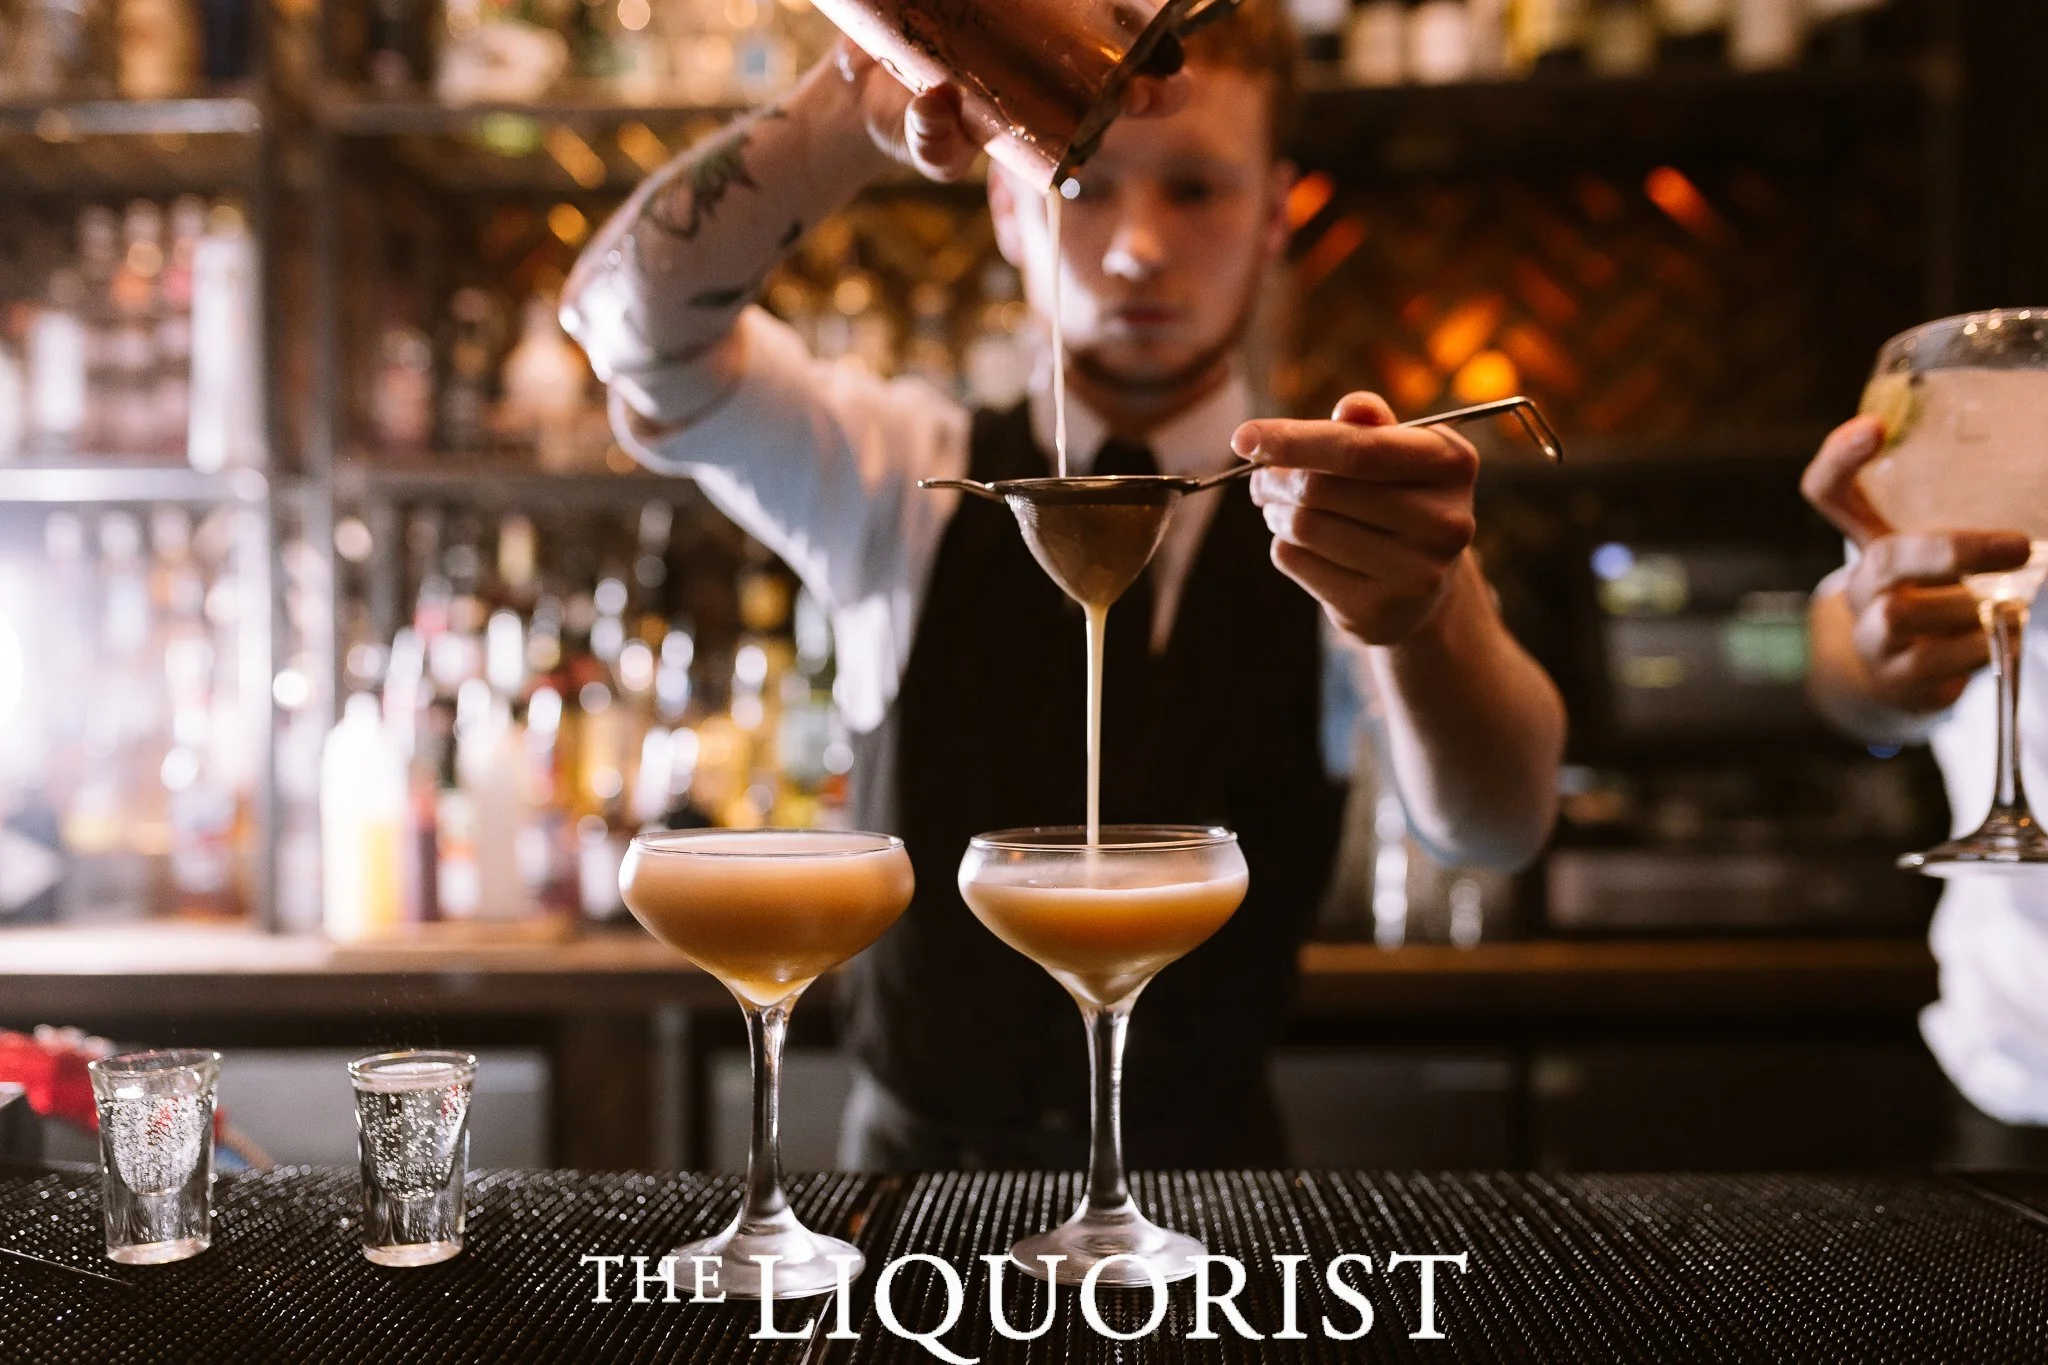
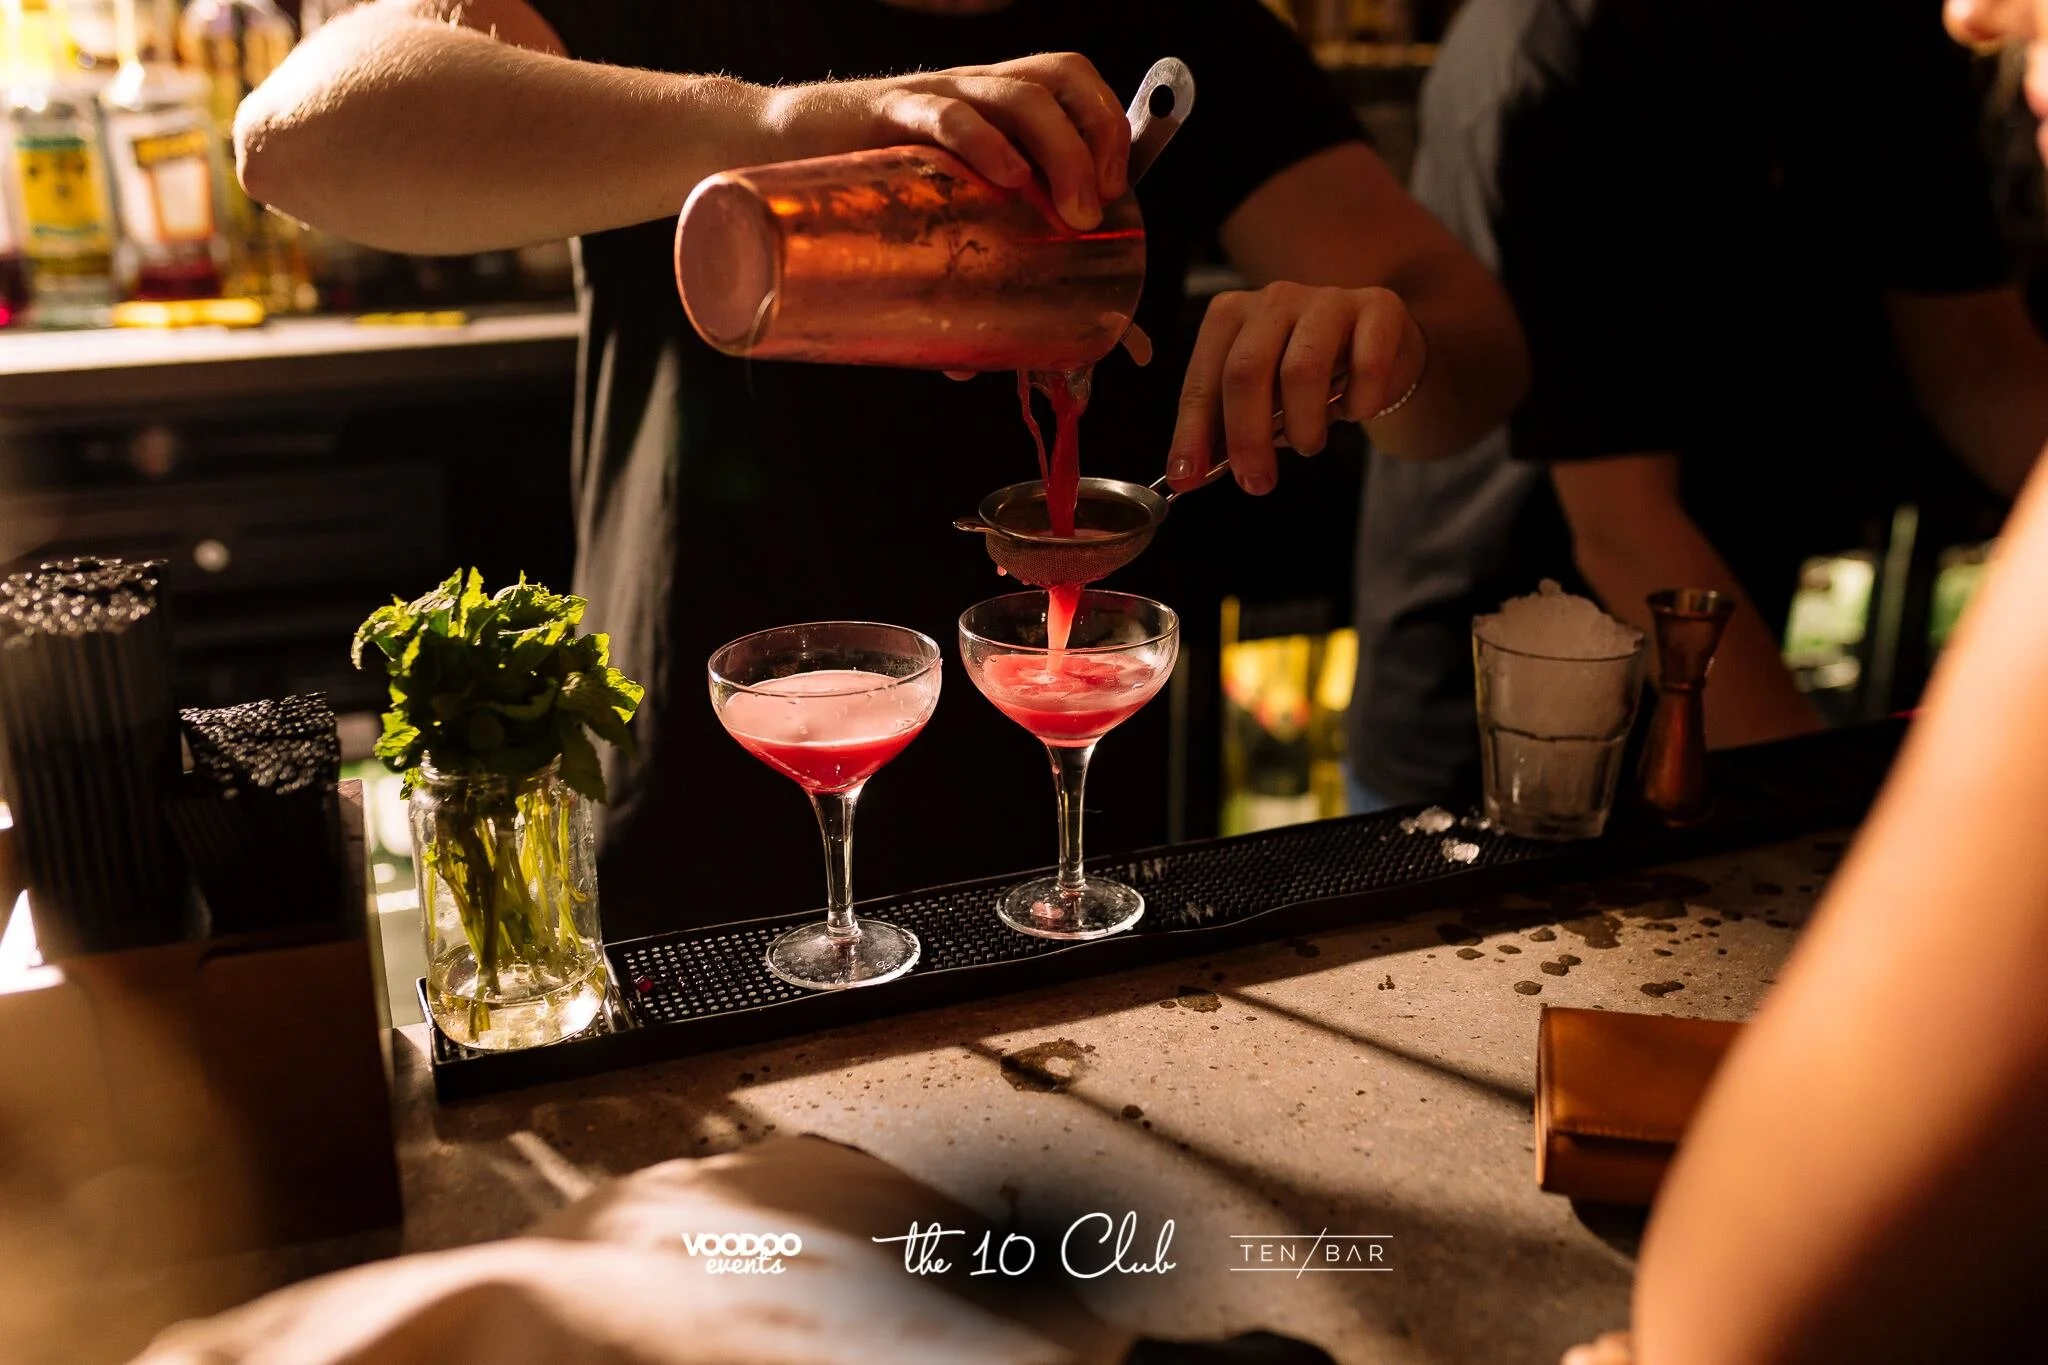
If you’re in a bar, try and get shots of people enjoying cocktails and prosecco etc. Even get some drink shots and bar staff pouring drinks!
Also, we know how awful some people can be on nights out so don’t feel discouraged by someone being rude saying how crap your photo(s) look if they ask to see them. They’re most likely under the influence or are just simply insecure. Usually, they end up liking the photo(s) when they’re posted. If the settings are good and you’ve taken at least 3 shots in that very moment, there is little to no reason your photos are “shit”.
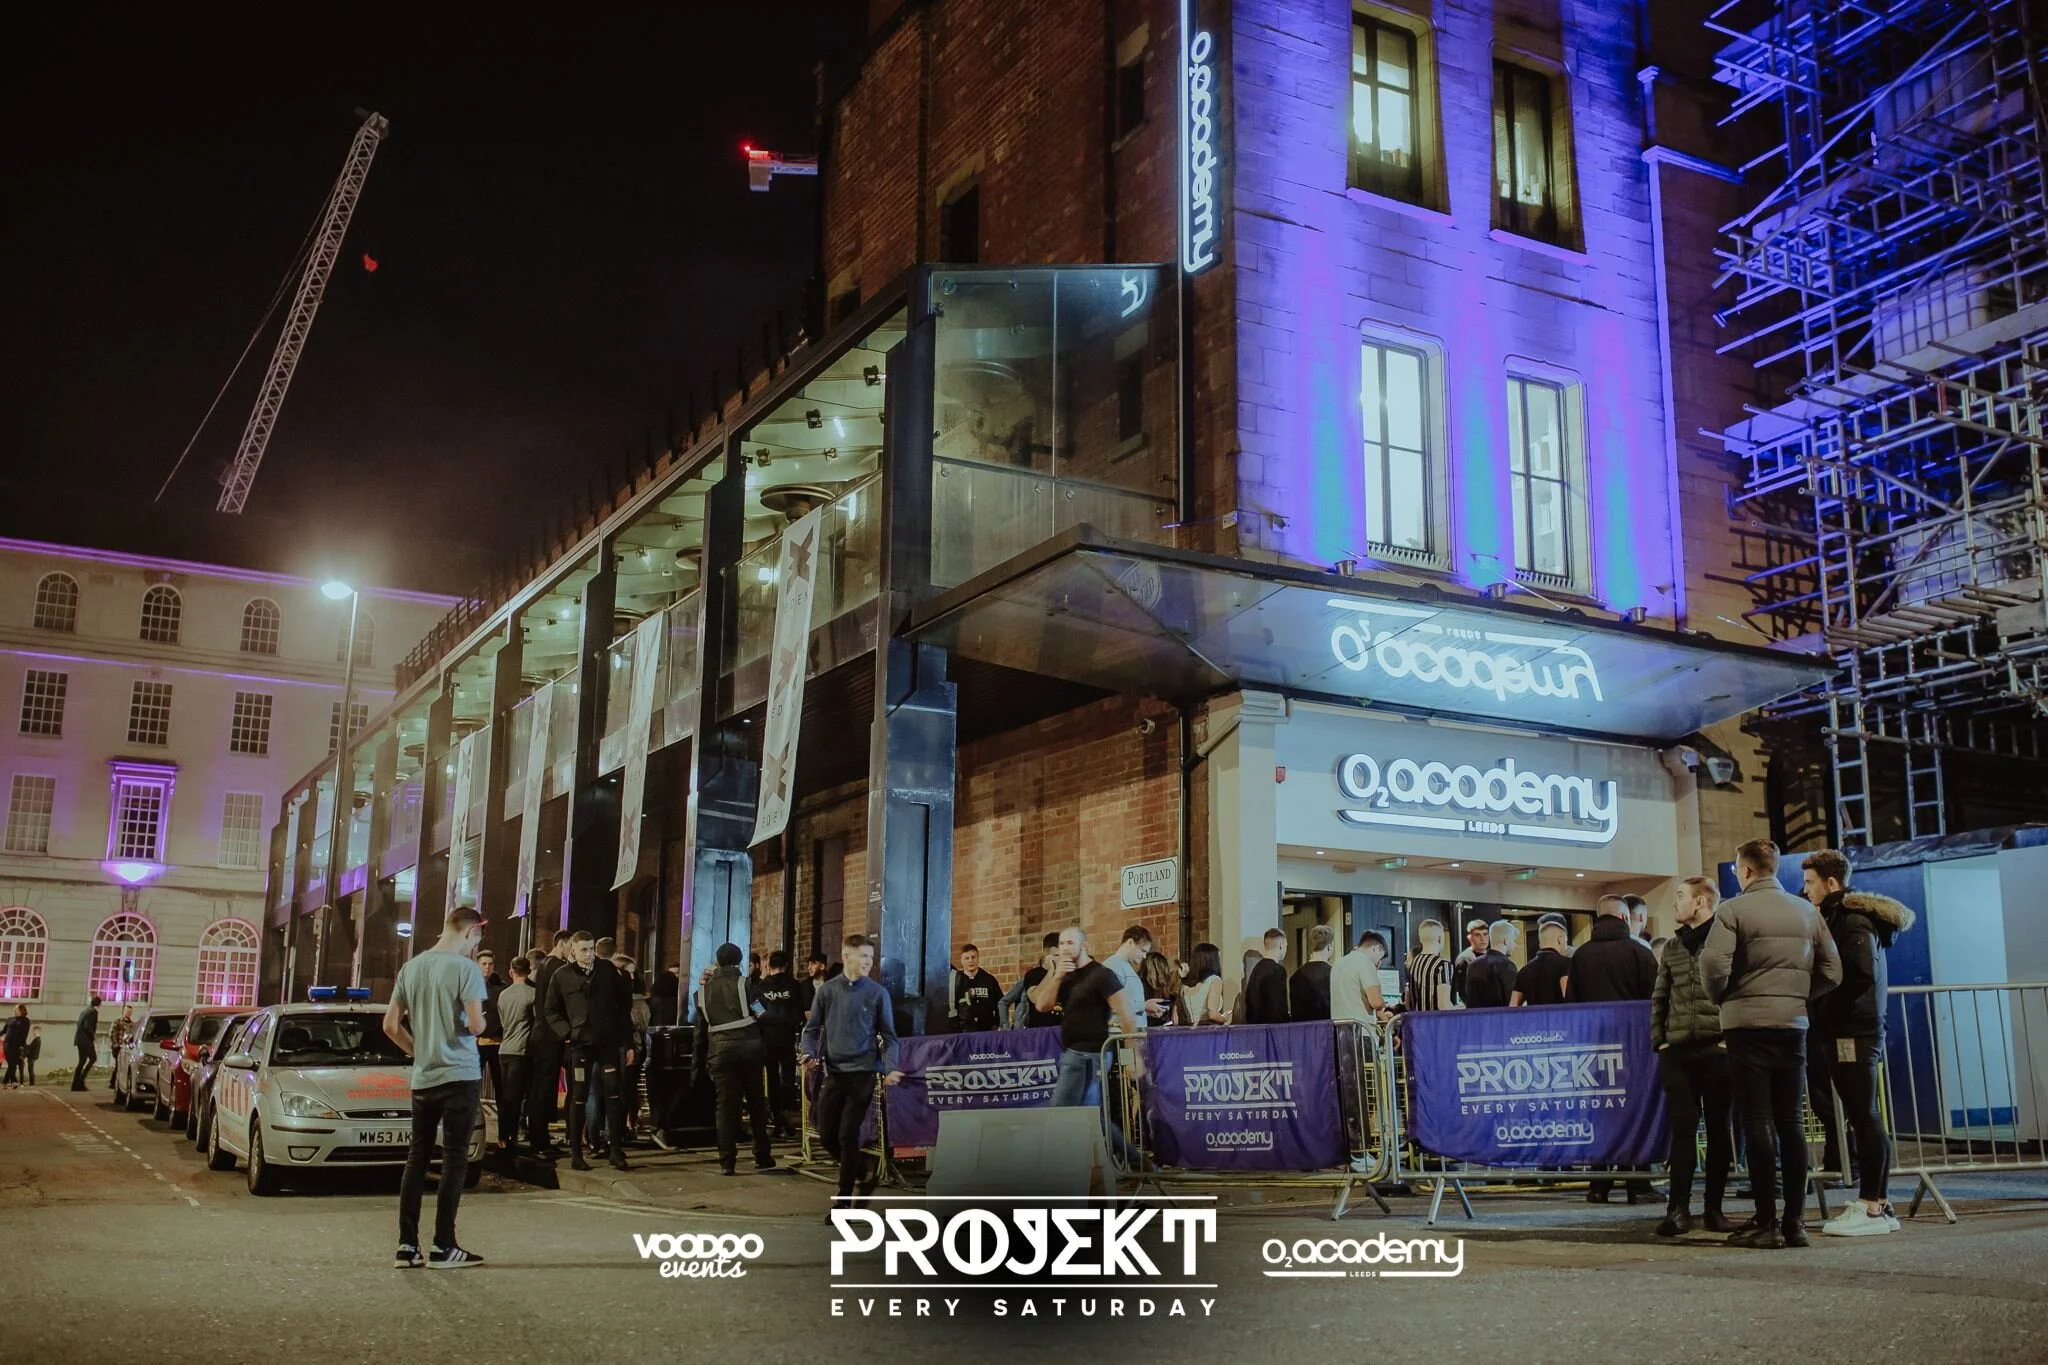
QUEUE SHOTS
Given the bar or club you’re working has a queue outside, and you’re starting your shift near the start of the opening/prime time for entry, do not neglect to take very few queue shots to show off how popular the venue is!
7. Quality and quantity
When it comes to editing your photos in post, we’d definitely say one of the biggest things you need to watch out for are people’s skin tones. Of course, this is totally true for all kinds of photography when people are the subject but you are working with a lot of colours in clubs (lights, fake tans, and different coloured walls).
We’ve seen some people’s club photos where they’ve oversaturated colours or managed to turn the oranges up so it doesn’t work well with skin tones (definitely not the greatest thing to do when it comes to naturally tanned and darker skin tones!). We’ve sometimes been asked to edit some photographer’s photos for clubs because the person in charge isn’t happy with that person’s edit, so just be mindful with your editing.
Also, don’t bother at all uploading photos where people just aren’t in focus. We’ve seen people do this and it looks like sloppy, lazy work.
Furthermore, you definitely don’t need to send or upload (if you’re part of admin) hundreds of photos either. We’d recommend aiming for 100 on average. No one wants to look through hundreds of photos just to find their picture(s) - it gets boring.
Add a meta description on your photos so you’re always credited too! Get your work and name out there! Some clubs and bars may also add you as part of admin for their Facebook pages. This means you’re most likely in charge with uploading your albums. If you have a few strong, favourite photos in an album, make them the first ones that show up in an album upload on newsfeeds - show your work off!
Above all, look after your gear as much as possible! Spilled vodka and coke ain’t fun, especially on your equipment!
Got any more tips for shooting bars and clubs? Comment below!